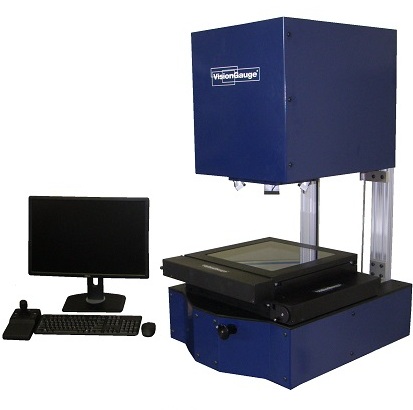
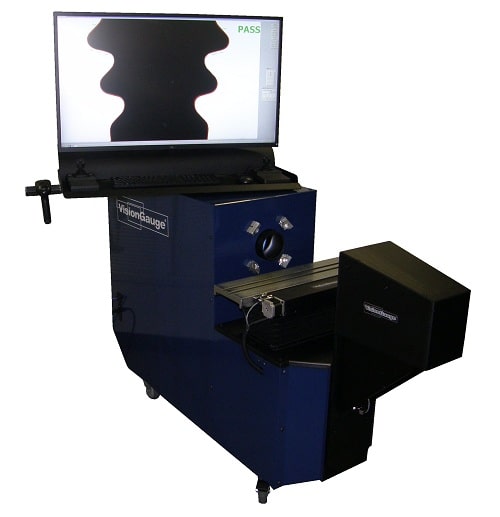
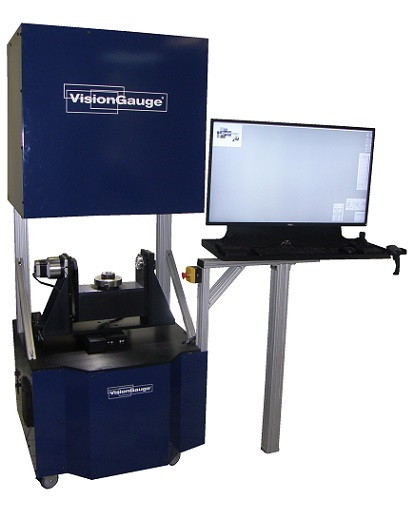
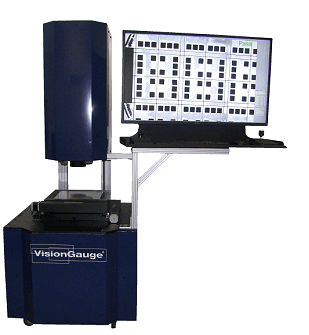
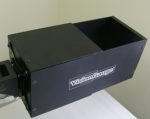
600 Series Inspection and Measurement Systems For Turned Parts

VisionGauge® 600 Series

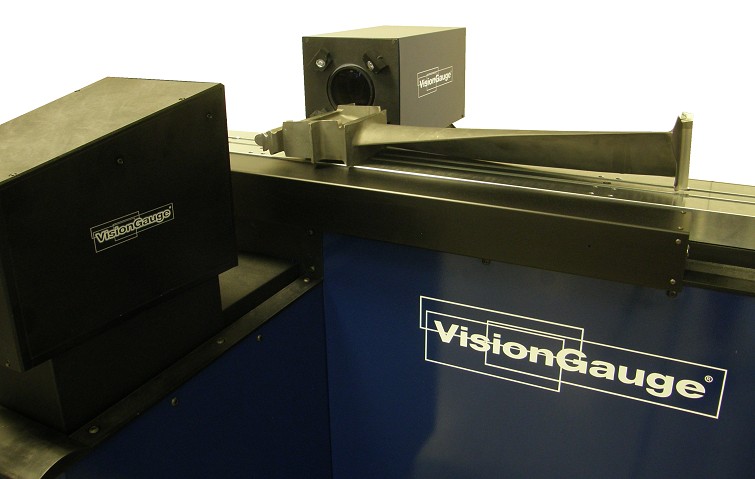
The 600 Series VisionGauge® inspection and measurement system is designed first and foremost to inspect and measure turned and rotationally symmetrical parts, such as:

  • Screws,
  • Bolts,
  • Rivets,
  • Shafts,
  • Other turned or formed parts…

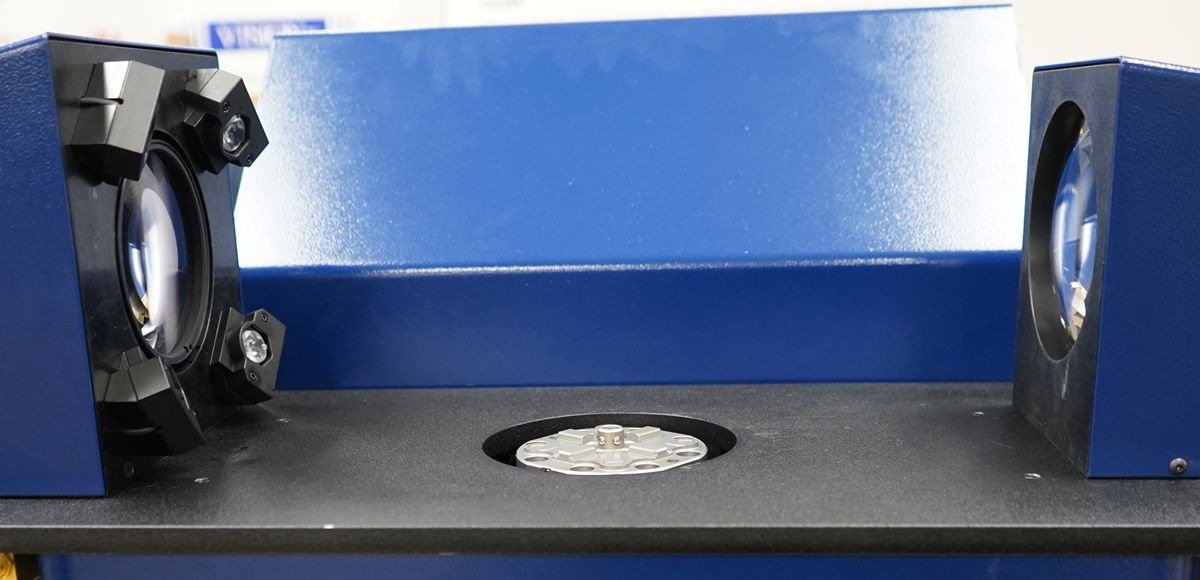
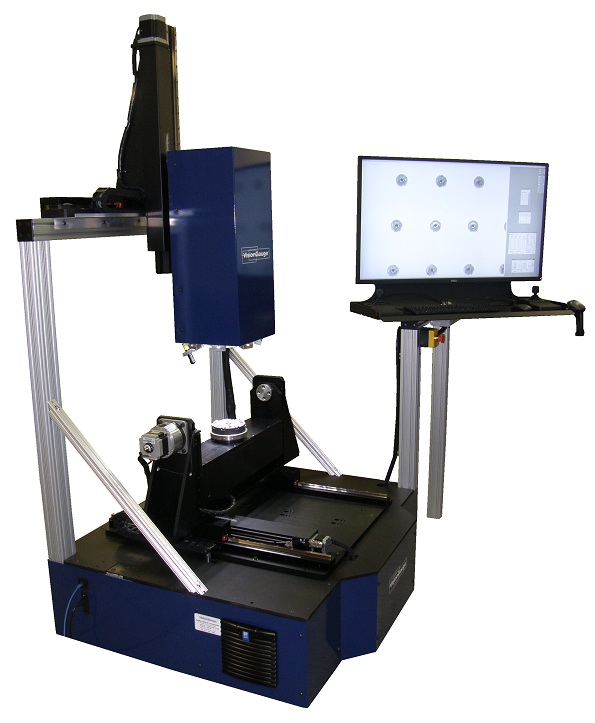
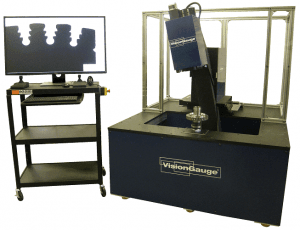
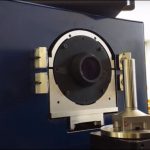
On the 600 Series VisionGauge® system, the part is mounted vertically and the system has two motorized encoded axes: one for part rotation and another for vertical movement (i.e. to move up and down the length of the part).

The system is used across a wide range of industries, including:

  • Medical Device manufacturing
  • Aerospace
  • Fastener industry
  • Automotive
  • Etc.

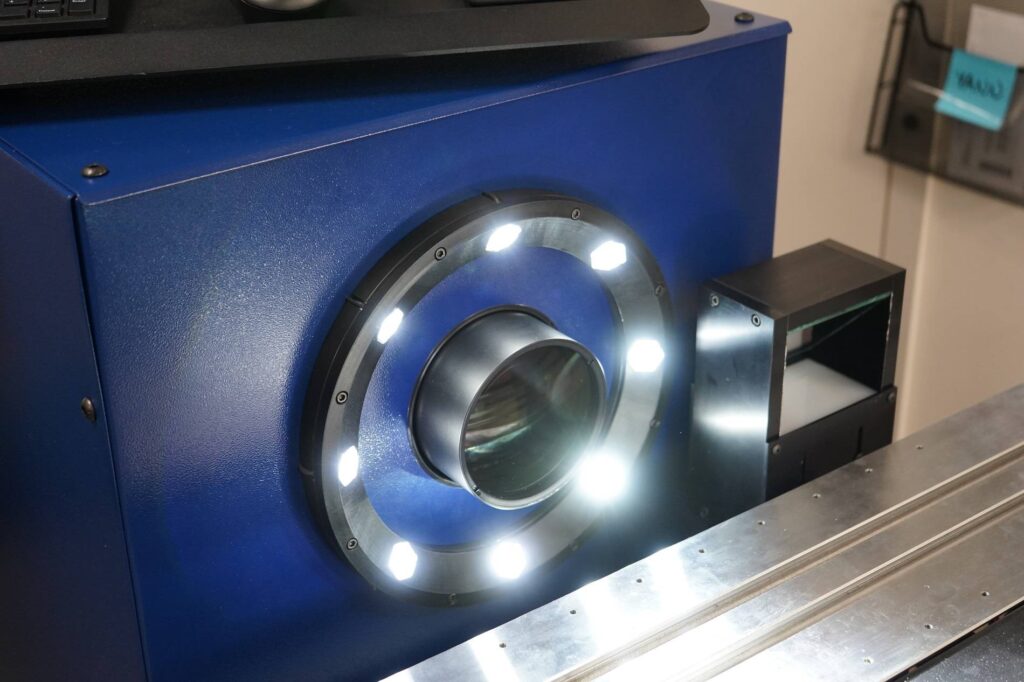
It has ultra-bright all-LED programmable and computer-controlled illumination, both transmitted (i.e. back illumination) to verify the part’s outline, and reflected (i.e. front illumination) to inspect and measure surface features.

It has a very high-resolution optical system, with a large depth-of-field and a long working distance and produces an optical accuracy better than +/-0.00015″ (i.e. 4 μm). It produces very crisp and clear, high-contrast, high-resolution images.

600 Series Features

The 600 Series system has all of VisionGauge®’s advanced software capabilities, including:

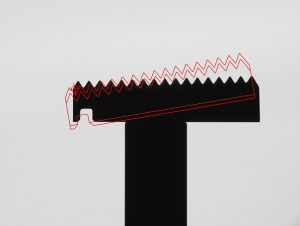
1. CAD Auto-Align™: This patented groundbreaking tool automatically aligns a CAD overlay to a specific part, feature or datum(s) during inspection. Within seconds, it produces repeatable results without any operator supervision, drastically reducing inspection time and improving measurement accuracy.

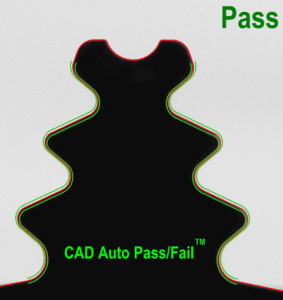
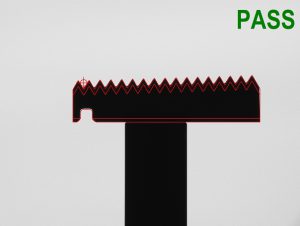
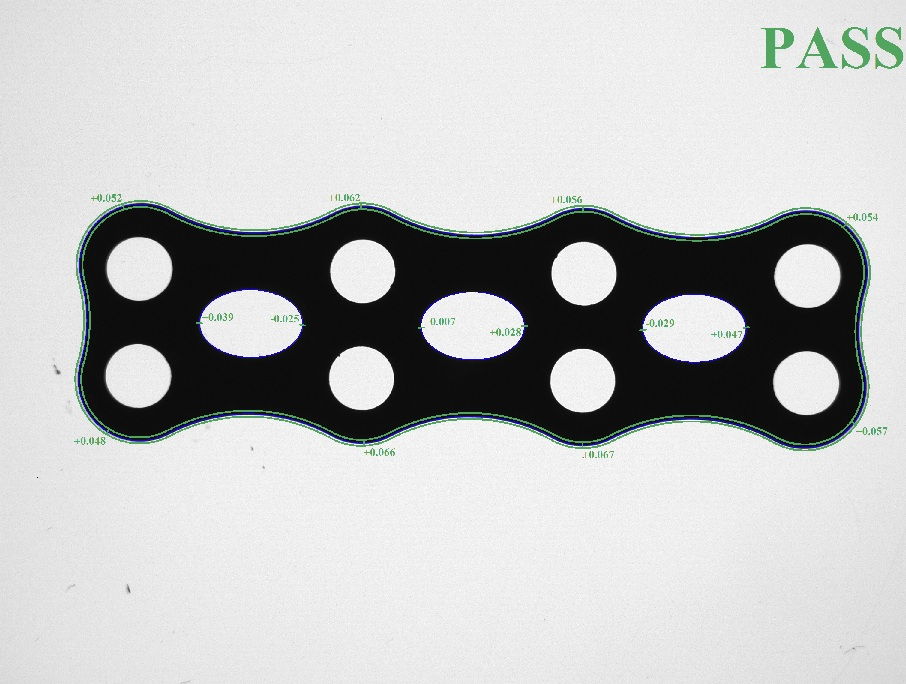
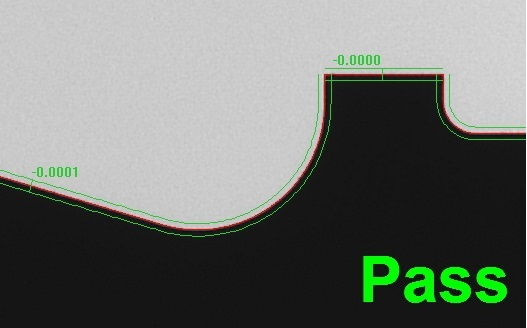
2. CAD Auto-Pass/Fail™ technology: The CAD Auto-Pass/Fail™ tool automatically determines whether a part is within tolerance and measures the deviation from nominal in real time and with great accuracy.

3. Tooth Checker™: Designed to check parts with teeth, the patented Tooth Checker™ tool automatically locates the crests and roots in the inspected part’s teeth or threads. It determines, to very high accuracy, if parts fall within their specified tolerance band.

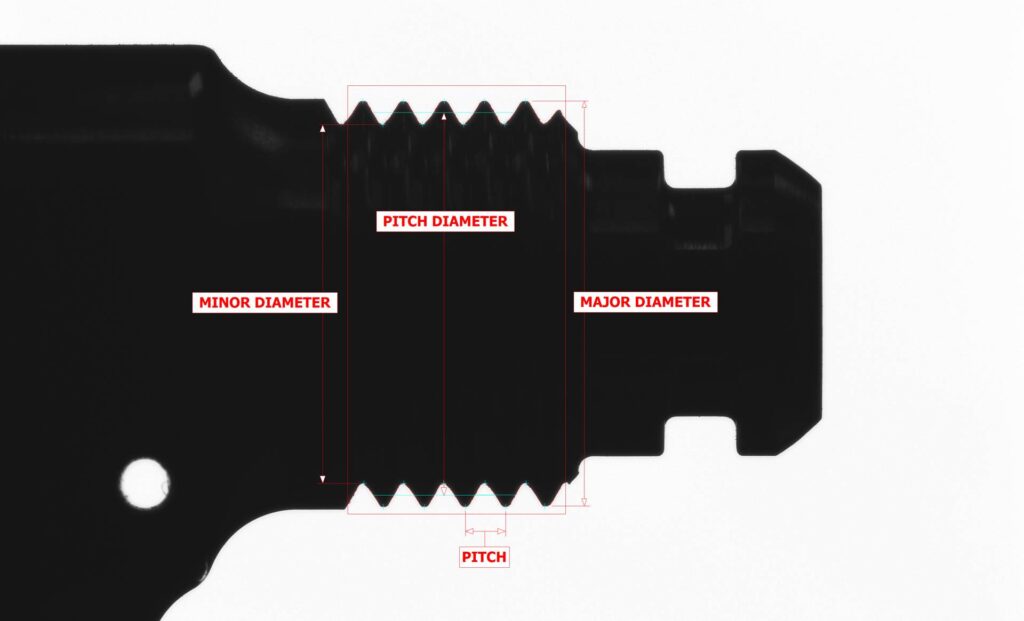
4. VisionGauge® Thread Measurement Tools: VisionGauge®’s advanced thread inspection tools perform automatic measurements on a wide range of parts with threads (not just limited to screws!). These non-contact measurements ensure that the related geometric aspects defining the threads conform to their manufactured specifications.

screw threads measurements with VisionGauge®

The 600 Series VisionGauge® system contains the entire set of powerful VisionGauge® measurement tools. It can measure:

  • Roundness,
  • Runout,
  • Coaxiality,
  • Cylindricity,
  • Parallelism,
  • …And much more!

Advantages of the 600 Series Inspection and Measurement System

Like all VisionGauge® systems, it can easily be interfaced to external equipment and machinery, such as an automated cell controller a collaborative robot for automated loading and unloading, for full “lights out” operation.

Measure turned parts with optical accuracy better than +/- 0.00015″.

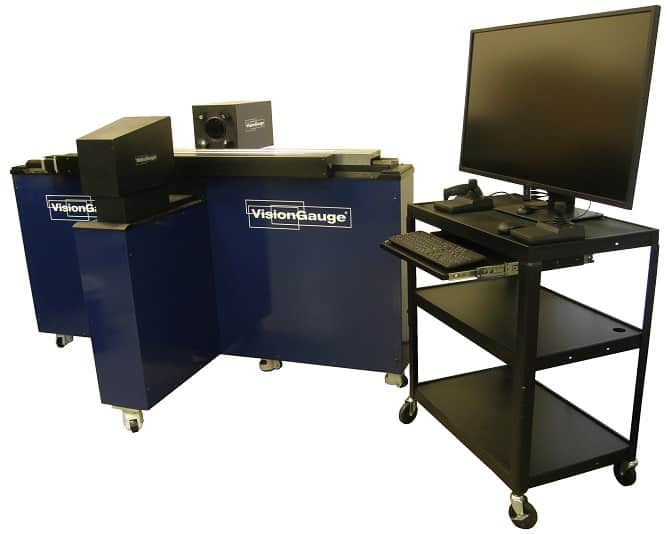
Compact desktop format.

The 600 Series VisionGauge® system is very robust and shop-floor-ready. With its intuitive Windows interface, it’s extremely easy to use.

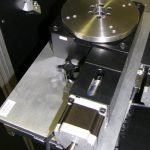
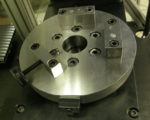
VisionGauge 600 Series Workholding
The system is very flexible and available with a wide range of customizable workholding setups.

Optimize Turned Parts Inspection and Measurement with VisionGauge® 600 Series Systems

Contact us with your application requirements, and visit our Applications page for more examples of applications VisionGauge® Inspection & Measurement Systems can solve.
Optical Comparators

Optical comparators play an important role in several industries. They enable the accurate inspection and measurement of different parts and components. These machines provide operators with quantifiable data vital to business operations.

VISIONx, Inc. offers a large selection of advanced digital optical comparators equipped with our proprietary technology. Our devices feature unique systems that fit a wide range of applications. Check out our comparator systems and find which one fits your needs best:

What Is an Optical Comparator?

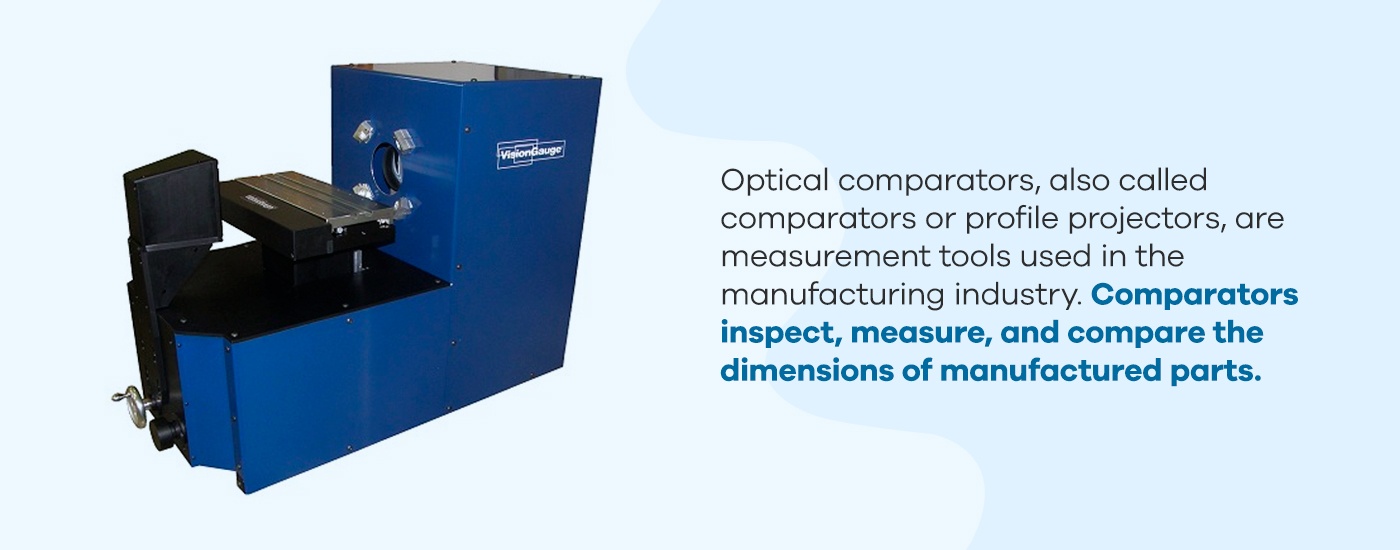
An optical comparator, also known as a profile projector, is a measuring apparatus typically used in the manufacturing industry. Its main function is to inspect, measure, and compare the dimensions of different manufactured parts. Optical comparators use lenses, mirrors, and illumination to project a magnified silhouette of a part. Learn more about what an optical comparator is and how to use it.

Optical comparators inspect, measure, and compare the dimensions of manufactured parts

Benefits of Our Optical Comparators

VISIONx, Inc. carries a wide selection of digital optical comparators suitable for various applications. Compared to traditional optical comparators, our VisionGauge® systems offer multiple benefits, such as:

  • Increased accuracy: Our digital comparators can automatically conduct detailed measurements and inspections. They eliminate operator-to-operator variations, ensuring accurate data and reducing the risk of human error.
  • Higher throughput: The system can run swiftly and fully automatically, allowing manufacturers to conduct more measurements in less time.
  • Optimized workflow: VisionGauge® digital comparators work directly with your existing CAD data. Our advanced patented technology provides detailed documentation of data, statistics, and pass/fail results for a streamlined process.
  • Cost efficiency: VisionGauge® systems remove the need for costly overlays. This function significantly reduces the operator’s expenses on Mylar production and labor costs while minimizing downtime.
  • Ease of use: Whether for manual or fully automated operations, the VisionGauge® systems are extremely easy to use and operate. The software is also customizable to your specifications, ensuring correct and consistent results for your industry.
  • A smaller footprint: Our VisionGauge® devices are compact and versatile, taking up less space. The systems are designed to allow you to conduct measurements and inspections straight from the shop floor.

Applications of Digital Optical Comparators

VisionGauge® digital optical comparators support many applications and industries. To name a few, these versatile devices are suitable for applications and industries, including:

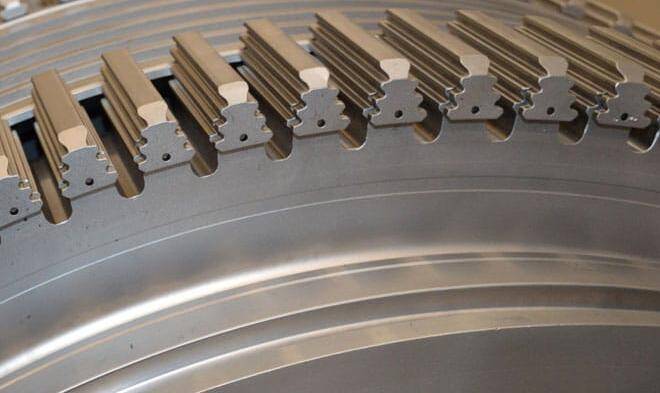
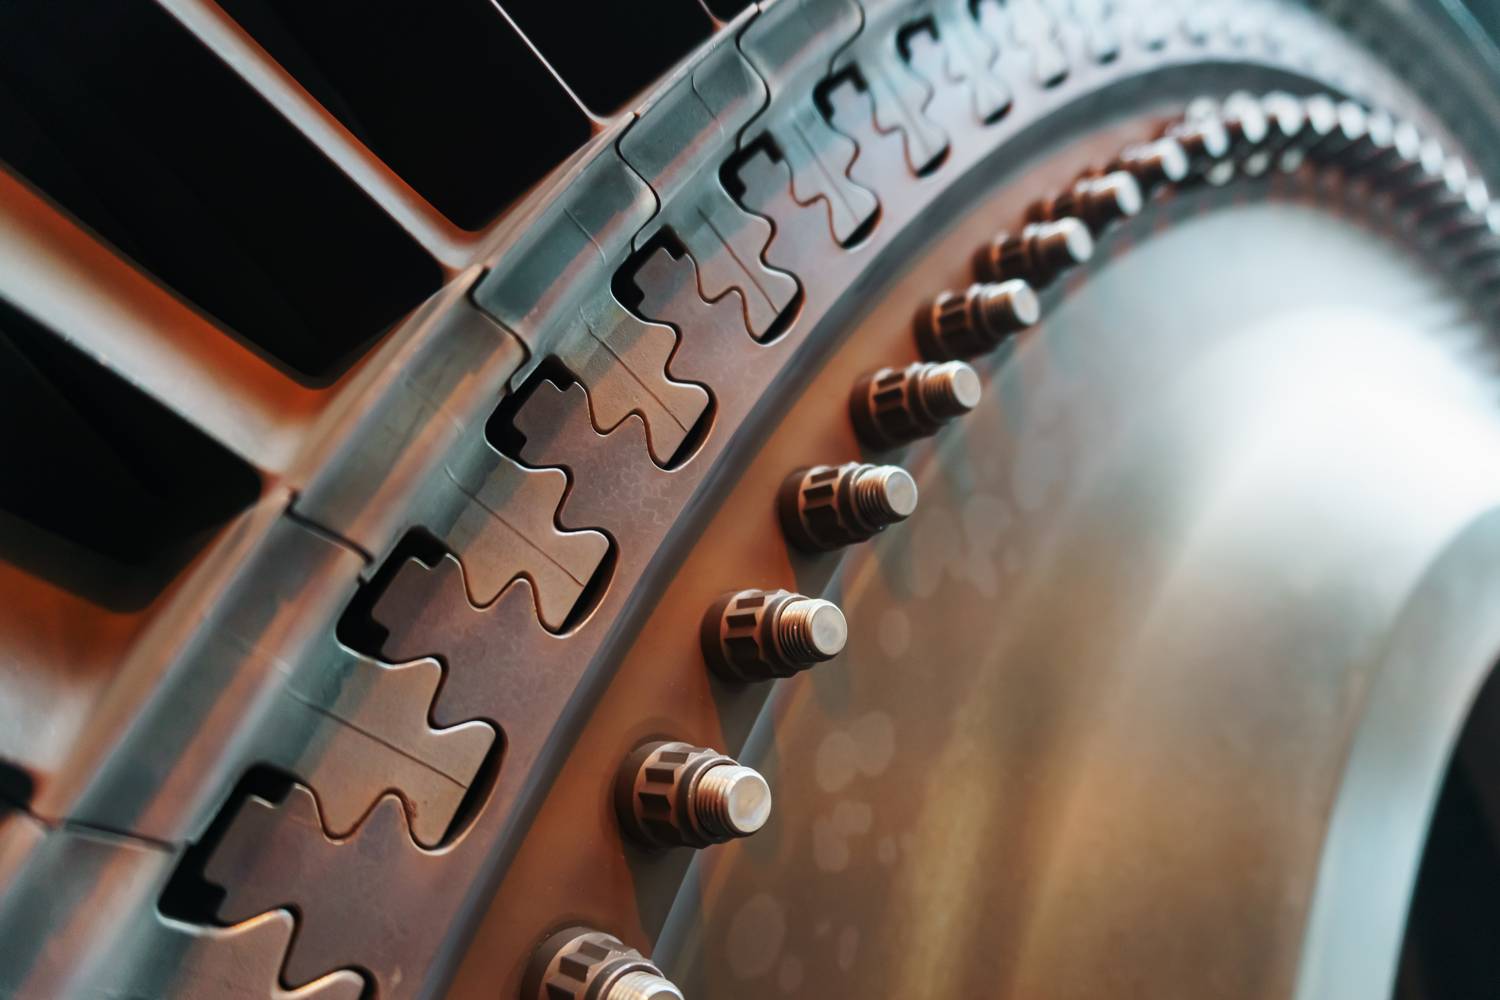
  • Aerospace: Optical comparators measure various parts in the aerospace and aeronautics industries, such as turbine disks, slots and blade fir trees, cooling holes, and seal slots.
  • Automotive: The automotive industry uses comparators to inspect and measure components, such as electrical connectors, gears, and valves.
  • Defense and Military: The defense and military sectors use a comparator machine to inspect parts with holes and slots. The device tracks the number of holes and inspects their location and geometry.
  • Medical Manufacturing: Optical projectors inspect a variety of medical devices and procedures, such as stents, medical rasps, implant screws, and orthopedic implants.
  • Power and energy: The power and energy sectors benefit from comparators when inspecting turbine components and mico-holes, as well as verifying the presence and exact location of different hole types.

Frequently Asked Questions About Our Optical Comparators

Do I Need Overlays for My Measurements?

VisionGauge® systems eliminate the need for mylar overlays when conducting inspections and measurements. Our advanced patented technology lets you work directly with your existing CAD data.

How Does Your Optical Comparator Ensure the Accuracy of Measurements?

Our systems are designed with high-accuracy measurements in mind and include high-quality components and advanced VisionGauge® software features such as sub-pixel measurements, Auto-Focus, and more. Our patented CAD Auto-Align™ and CAD Auto Pass/Fail™ tools automatically examine parts and provide data within seconds, ensuring objectivity in all inspections. Learn more about the accuracy of our optical comparators.

How Do I Know if the VisionGauge® System/Software Matches Standard Applications in My Industry?

Our in-house application engineers will work with you and your team before and after the sale. We can customize and adapt systems to ensure they meet your needs and match specific industry standards.

Choose VISIONx for Your Optical Comparator Needs

Browse our catalog of optical comparators for sale to learn more about the features and capabilities of our devices. For all inquiries, contact us online today.

Super-Extended Travel Configurations

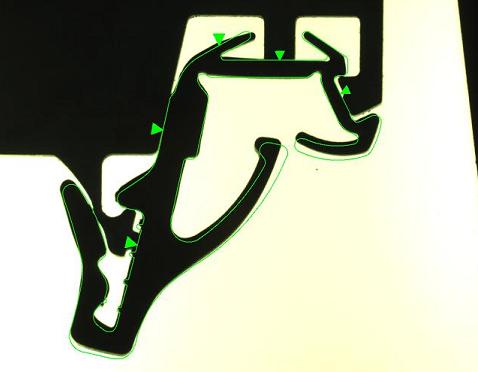
Fir Tree Auto-Pass/Fail Inspection

Our Digital Optical Comparator for Large Parts Inspection

The Super-Extended Travel Configuration 500 Series VisionGauge® Digital Optical Comparator is a precision system designed specifically to inspect and measure big and heavy parts. They have up to 60” of travel and support loads of up to 300 lbs!

Parts are set on the system’s X-Axis stage, which is built using precision rails and is set on a floor-mounted granite base. The camera is mounted on the Z-axis and the entire assembly, along with the front and back illumination, move up and down on the Y-Axis. In this way, the Y and Z axes are completely disconnected from the rugged granite-base-mounted X-axis that supports all of the part’s weight. The axes have 0.25µm resolution encoders for high-accuracy positional feedback.

This innovative configuration is designed to provide optimal rigidity and eliminate any mechanical deflections. Everything is optimized to allow the system to produce very accurate measurements of long and heavy parts.

500 Series Super-Extended Travel Configuration Advantages

The system provides all of the advantages of the 500 Series VisionGauge® Digital Optical Comparator and includes additional benefits that make it stand out from the competition:

  • Fully-automated: no operator-dependent variation!
  • Fast and accurate performance delivering very high throughput
  • Extremely easy-to-use for operators and programmers: Little or no programming, i.e. “I’ve got a part, I’ve got a CAD file, and I’ve got a minute”
  • Features VisionGauge’s patented CAD Auto-Align™ & CAD Auto Pass/Fail™ tools
  • Automatically computes and displays a part’s deviation from nominal and compare it to bi-directional tolerances
  • Produces a beautiful and very high-resolution, high-contrast image with very sharp edge profiles. You can see very fine details very clearly
  • Works directly with CAD data so no templates or overlays are necessary – compare a part to its CAD file beyond the optical field of view (because the CAD data tracks the part and follows the stage motion)
  • Very robust and shop-floor-ready
  • Has all-LED illumination (for very stable & repeatable illumination conditions, very stable & repeatable results, low heat, low power consumption and no bulbs to change)
  • Can collect full inspection & measurement data and automatically create reports including digital images & records with the CAD overlay and the deviations from nominal, measurements, statistics, etc…

The system is powerful and widely-applicable – capable of solving a vast number of applications across many industries. In particular, the Industrial Gas Turbine (IGT) / Power Generation industry greatly benefits from the use of this system for inspection of fir trees / root forms on buckets. We can also design and build oversized systems to meet unusual or one-of-a-kind requirements.

Super-Extended Travel 500 Series VisionGauge® Digital Optical Comparator inspecting fir tree / root forms on buckets
Fir Tree / Root Form Inspection with the Super-Extended Travel 500 Series VisionGauge® Digital Optical Comparator

Features

The VisionGauge® Digital Optical Comparator 500 Series Super-Extended-Travel Configuration is designed to inspect large and heavy parts with performance, reliability, and high-accuracy in mind.

  • 60″ of travel for large parts, supporting up to 300 lb loads
  • Precision components designed for optimal stability and performance for heavy parts across the entire range of travel
  • 0.25µm resolution encoders provide high-accuracy positional feedback
  • Includes VisionGauge®’s advanced measurement and inspection toolset to carry out fully-automated measurements, including proprietary software tools for direct CAD-to-Part comparison
  • With the system’s large depth of focus, “everything is in focus at once”, and the large field-of-view means you can see more of the part at once.
  • The long working distance gives more clearance between the part & the lens
  • Power-Focus and Auto-Focus keep part edges crisp for very accurate measurements
  • Super-high resolution monitor allows you to see all the details of the image at once
  • Extremely easy to use software interface
  • Automated image/data collection and a wide array of reporting and data exchange features

Super-Extended Travel and Oversized Systems Gallery

  • a visiongauge machine sat next to a computer on a tall black stand
    VisionGauge® Digital Optical Comparator Super-Extended-Travel Configuration

Contact us with your requirements for more information on how the VisionGauge® Digital Optical Comparator 500 Series Super-Extended-Travel Configurations are suited to solve your application.

VisionGauge® Disk Inspection and Measurement Systems

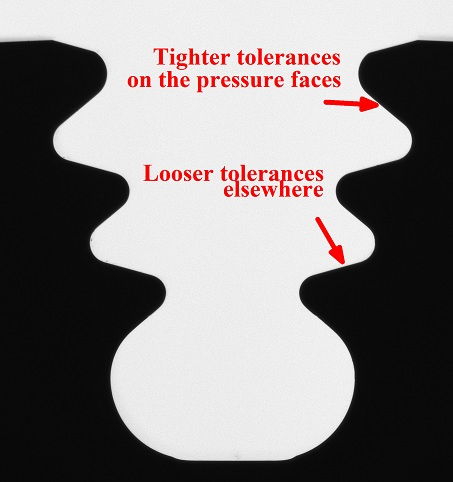
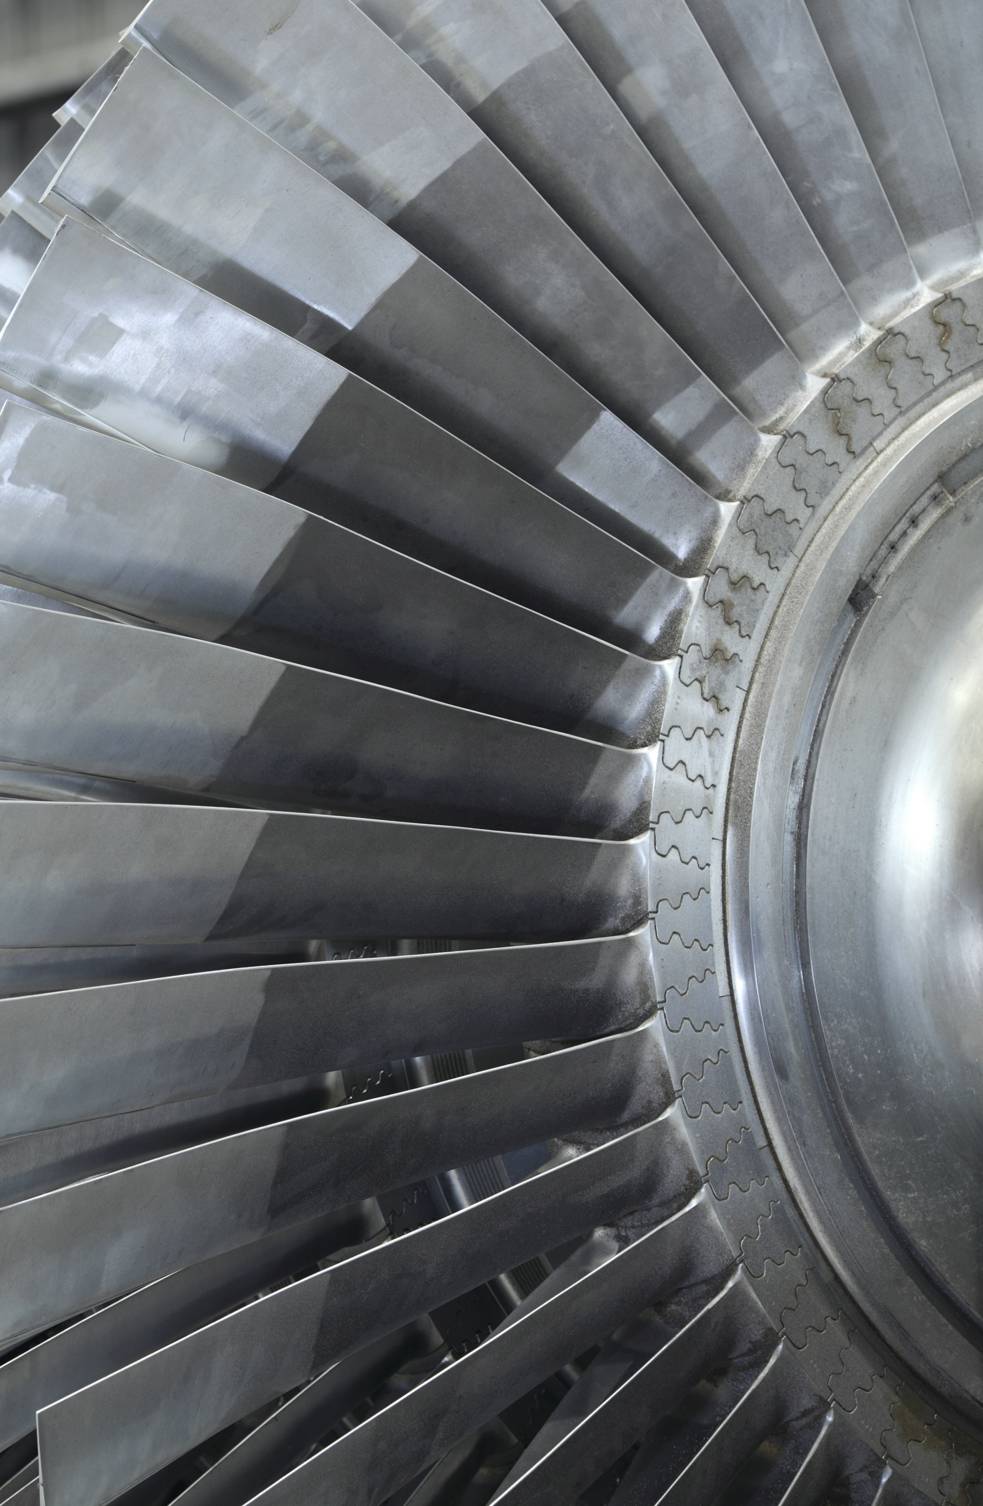
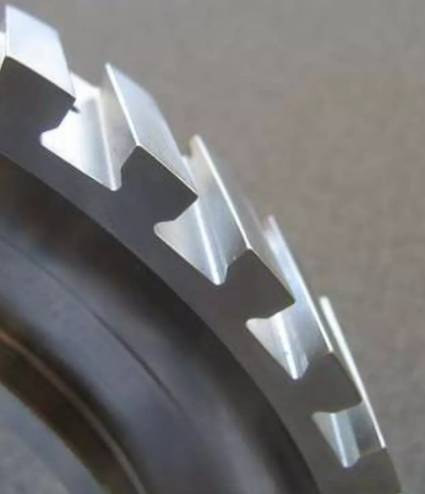
Turbine and compressor disk fir-tree slots and root forms are generally manufactured through broaching, wire cutting, or milling along with follow-up deburring and rounding operations. These features have complex geometries and very tight tolerances that are difficult to achieve. In particular, the pressure surfaces that constitute the critical point of contact between the blade roots and disc during operation are subject to very narrow tolerances in the order of 10–20 µm.
To ensure that the disk slots match up perfectly with the corresponding turbine blade shapes and provide proper performance, it is essential to accurately control the shape, position, orientation and alignment of the disk slots.

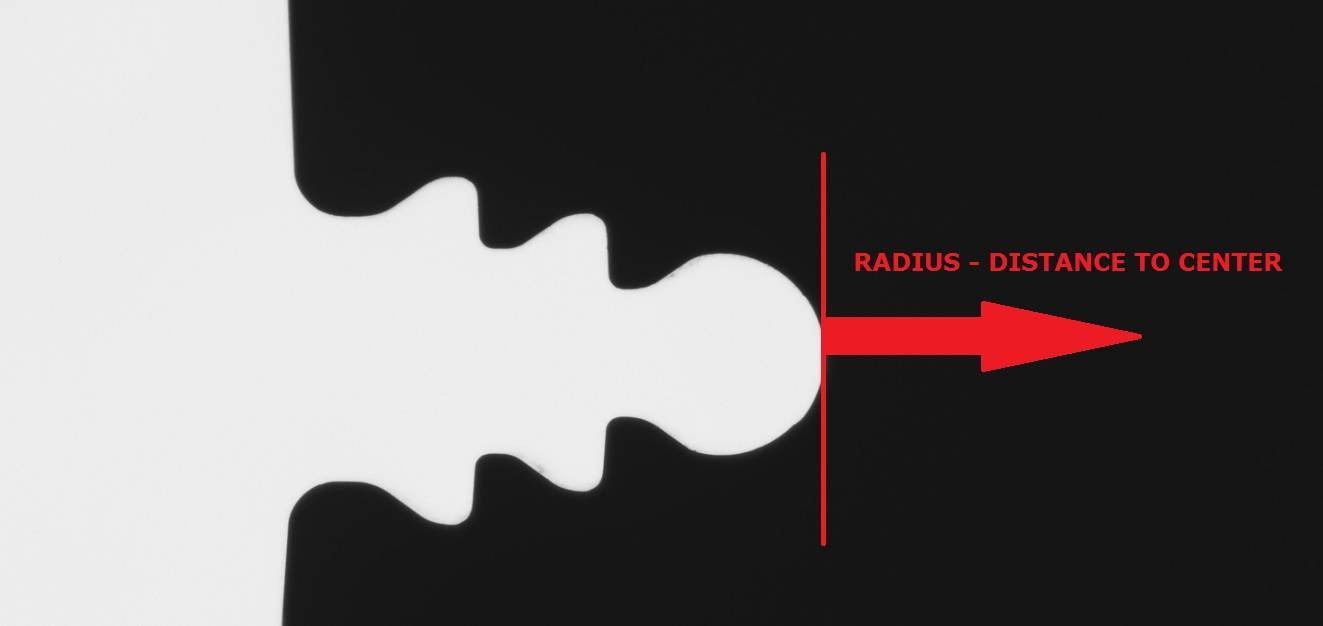
Fir trees with variable tolerances during turbine blade inspection

The VisionGauge® Disk Inspection & Measurement System is designed specifically for this. The system’s patented CAD Auto-Align™ and CAD Auto-Pass/Fail™ tools are unique technologies that allow the system to produce results of very high accuracy, completely automatically and with absolutely no operator dependence or subjectivity. It is fast and can carry out 100% inspection of 100% of the slots on every disk.

Some capabilities of the VisionGauge® Disk Inspection & Measurement System include:

  • Fully automated profile inspection
  • Completely automated knife edge setup
  • Radial length/Z plane distance inspection
  • Centerline inspection
  • Slot spacing inspection
  • Supports cone & helix angles
  • Verification of pressure face flatness/slot perpendicularity inspection

VisionGauge® Disk Inspection & Measurement Systems can also be used to carry out complete reporting, data capture, and analysis, including:

  • VisionGauge®’s powerful CAD Auto Pass/Fail™ Analysis mode makes it very easy to review non-conforming profiles. It allows the operator to automatically snap directly onto failed edge points, thus increasing efficiency when verifying out-of-spec regions.
  • Data for every inspected slot is automatically registered in its respective Data Group. Additionally, results can be quickly & easily reviewed as the system automatically returns to a specific slot’s location by simply double-clicking on the corresponding Data Group entry.
  • 5 axes of motion (X, Y, Z, Rotary, Tilt) to properly view slots at all angles, increment from slot-to-slot, etc.
  • Fully-automated operation.
  • No operator-to-operator variation
  • Quickly, easily and accurately inspect 100% of a disk’s slots
  • Easy to program (can use your CAD data directly!)
  • Fast, accurate & easy-to-use
  • Extensive set of VisionGauge® advanced high-accuracy inspection and measurement tools
  • Straightforward operator interface: barcode-reader and joystick
  • Intuitive software
  • Patented & patent pending technology with powerful & innovative software tools
  • Sharp, clear & ultra-high resolution image!
  • Extended optical depth of field and extended working distance for maximum flexibility!
  • Automatically create reports and collect measurements, statistics, images and other data for complete documentation
  • Automatic image & data collection with built-in SPC and data-exchange capabilities
  • Fast and intuitive “operator review” mode to quickly revisit out-of-tolerance areas
  • High-precision movements on all axes
  • High load capacity (for large & heavy disks)
  • Robust shop-floor design
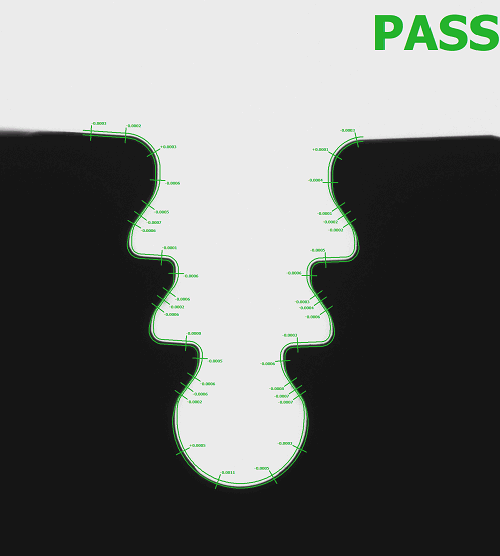
VisionGauge® Disk Inspection and Measurement System Pass/Fail results

The system’s patented CAD Auto-Align™ & CAD Auto-Pass/Fail™ tools
allow you to automatically check the slot profile, get deviations from nominal, etc…

These very accurate tools produce results that are completely operator-independent

  • High-resolution precision optics to resolve very fine details with great clarity.
  • Standard systems include 12″ X-axis travel, 12″/24″ Y axis travel, 12″ Z-axis travel with extended travels available to accommodate large disks.
  • A (tilt) axis range from – 40 deg to +40 deg, B (rotary) axis range from 0 deg to +360 deg.
  • All axes have closed-loop encoder feedback.
  • All axes include high-accuracy preloaded crossed-roller movement.
  • Includes both bi-telecentric transmitted (i.e. back) illumination and reflected (i.e. front) illumination with Ultra-bright, computer-controlled and programmable LED’s.
a visiongauge machine sat next to a computer on a stand
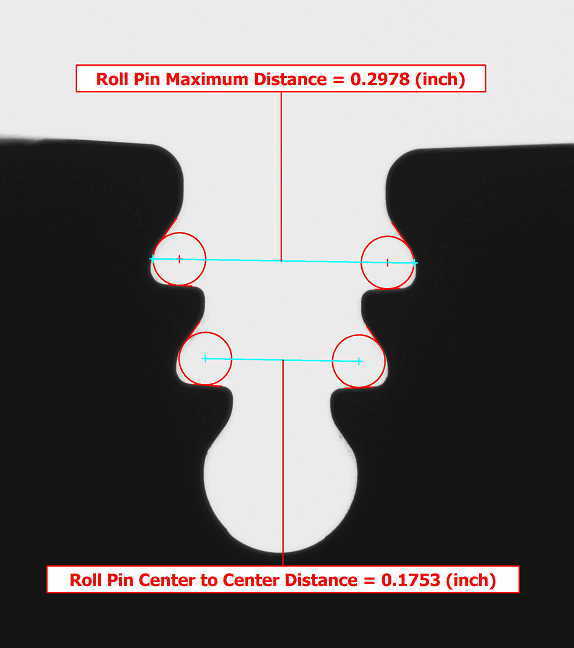
VisionGauge®'s Roll Pin distance measurement tool
Measure roll-pin distance, slot spacing, etc…
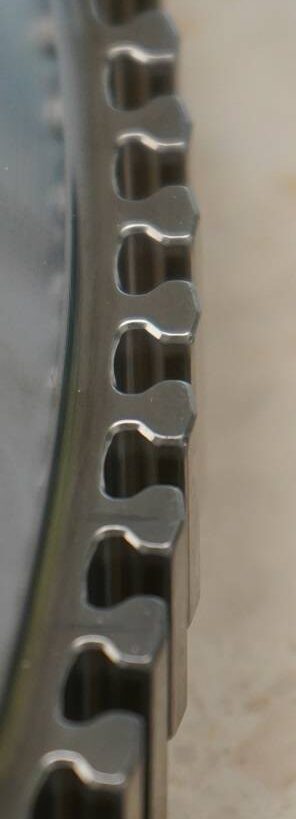
turbine disk and blade dovetail joint
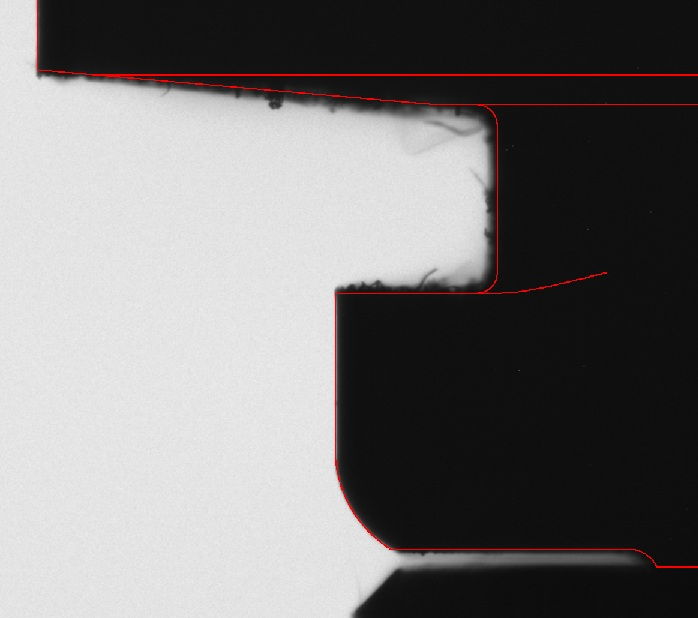
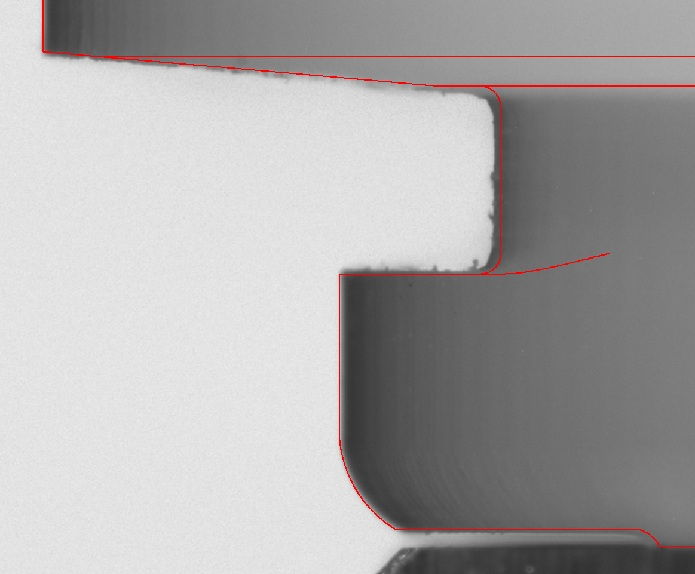
turbine disk dovetail inspection
turbine disk fir tree inspection
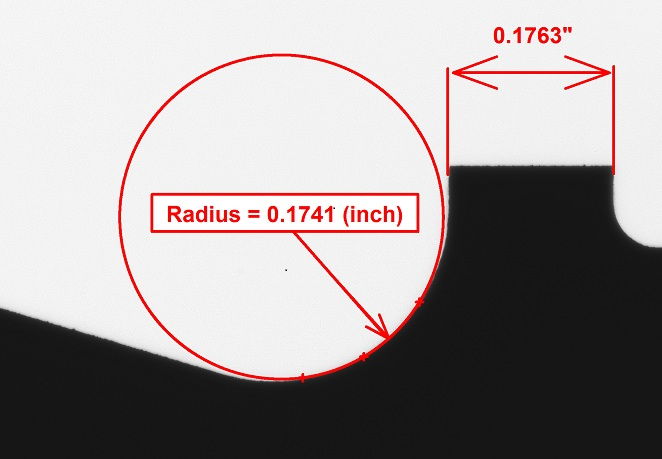
turbine broach radius measurement with VisionGauge®
turbine disk root form prepared for inspection
turbine disk dovetail joint

Technical Specifications may be found in the downloadable data sheet.

VisionGauge® Standalone Inspection & Measurement System

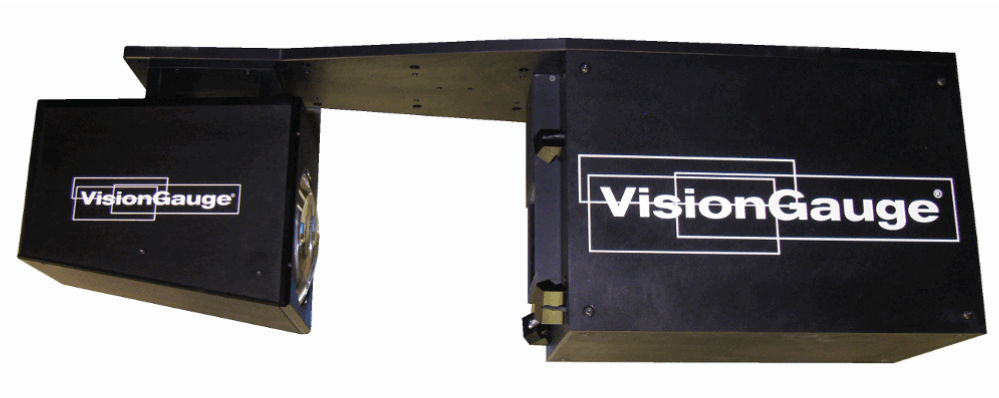
The VisionGauge Standalone Inspection and Measurement
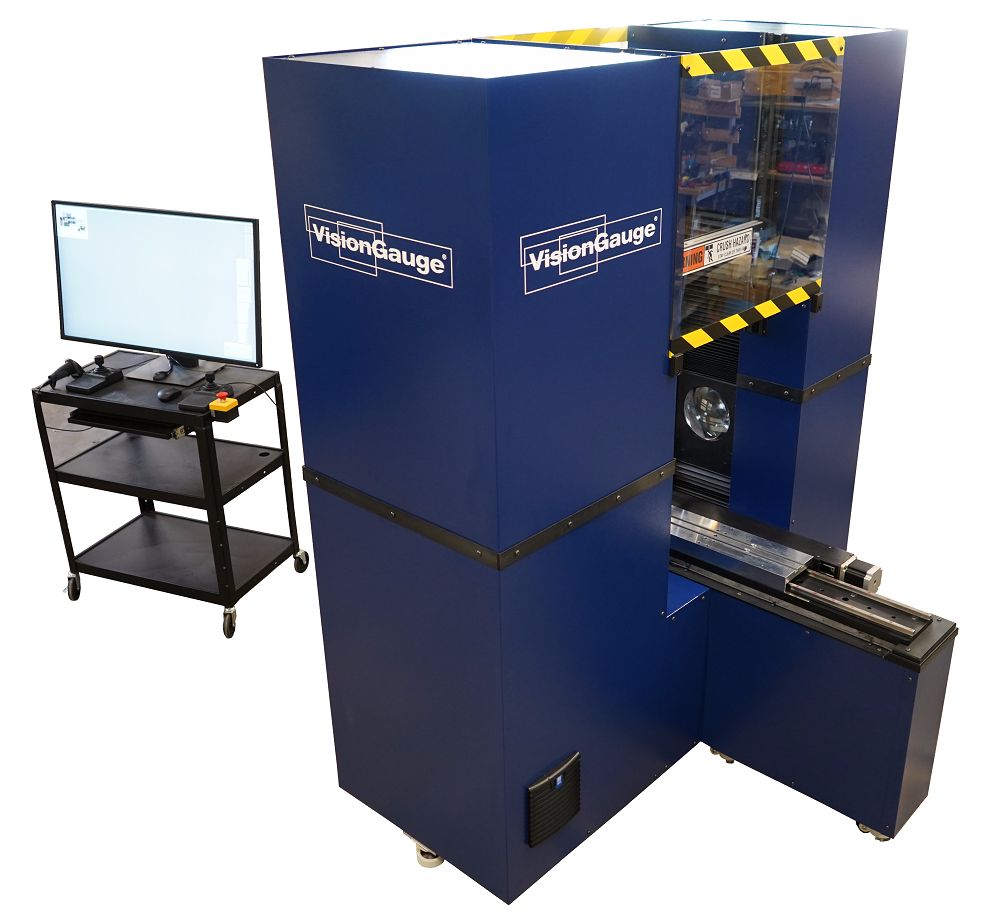
The VisionGauge® Standalone Inspection and Measurement System’s main unit can be installed in any orientation: horizontally, vertically, upside-down… however best suits the space in your automation cell.

The VisionGauge® Standalone Inspection & Measurement System is a high-accuracy measurement system designed specifically for automation applications. The system is widely-applicable and extremely general purpose, and it can be easily dropped into an existing automated cell.

Our VisionGauge® OnLine software includes Remote Program Communications, an extensive set of communication protocols over a variety of interfaces (via TCP/IP over ethernet, digital I/O’s, COM port, etc.) for full 2-way handshaking (with a robot or cell controller, for example), error/result reporting, and remote control over automated program operations.

The VisionGauge® Standalone Inspection & Measurement System includes all of VisionGauge®’s advanced inspection and measurement tools, including our patented CAD Auto-Align, CAD Auto Pass/Fail, and the patent-pending Tooth Checker tool, making it perfect for automatically carrying out very high-accuracy inspections and measurements.

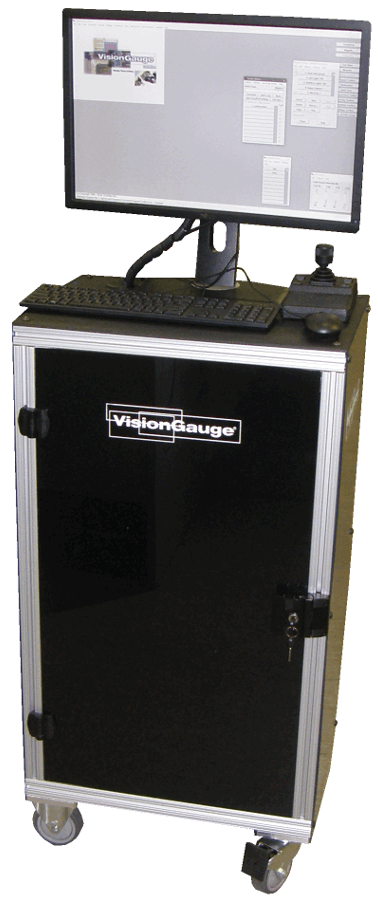
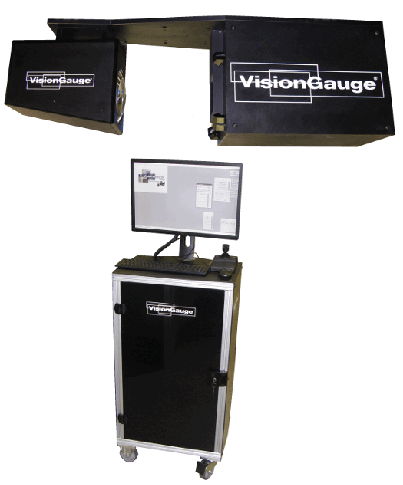
The mobile cabinet containing controls, user interface and I/O connections for the system
Remote cabinet with controls, user interface & I/O connections

Advantages of VisionGauge® Standalone Inspection & Measurement Systems

In addition to its versatility, the VisionGauge® Standalone Inspection and Measurement System has many benefits compared to existing technology. Our adaptable software intelligence in automation means there is less reliance on operators and more focus on software and tools. This model combines advanced software and precision optics to offer greater speed, accuracy, and efficiency compared to older measurement devices.

Additional advantages of using our video inspection measurement systems and equipment include:

  • Access to VisionGauge®’s full imaging, inspection, and measurement toolset
  • Ready to integrate into any existing process
  • Fully-automated programs with multiple options for error/result/status reporting (Digital I/O signals, TCP/IP commands, etc.)
  • Eliminates variations between operators
  • Automatic electronic documentation of all inspection results
  • Save floor space
  • Compatible with existing part-positioning equipment, robotic components, and automated cells over a variety of interfaces
  • Intuitive, user-friendly interface
  • Exclusive, proprietary software and tools and world-class Application and Technical Support

Additional Features

The benefits of using a VisionGauge® system are evident in its state-of-the-art inspection and measurement features – particularly its intuitive image analysis technology and sub-pixel accuracy. Our video measuring equipment has features that make it one of the best quality control solutions for a wide variety of industries. Medical device manufacturing, military & defense, aerospace, automobile manufacturers, and many more can use this system to improve daily operations.

The VisionGauge® Standalone Inspection and Measurement System’s features include:

  • High-resolution optics and imaging
  • Configurable in any orientation for easy integration
  • 3 different types of LED illumination
    • Transmitted back illumination
    • Reflected off-axis illumination
    • Reflected coaxial illumination
  • Exclusive patented VisionGauge® software and tools like CAD Auto-Align™ and CAD AutoPass/Fail™
  • Greater depth of field for better focus
  • Long working distance
  • 10x or 20x magnification
  • High-contrast, high-quality images
  • Easy communication with automated cells with full two-way handshaking over a variety of interfaces
  • Data collection and exchange capabilities including Pass/Fail, data manipulation, charting, and statistics
  • and much more…

Technical Specifications may be found in the downloadable data sheet.

What Is a Video Inspection Measurement System?

A computerized video measuring system inspects live images of manufactured parts, often using a computer-aided design (CAD) file as a reference. Older systems may have required extra physical components like templates and overlays. Using digitized CAD data directly eliminates the need for those resources. When comparing a part to its design specifications, performing measurements, performing defect detection, etc., the system collects data and may generate a Pass/Fail result. Manufacturers use that information to conduct quality control processes.

Controlling the quality of the parts you produce is crucial. Modern measurement devices are faster, more powerful, and more accurate than traditional models. The efficiency and reduction of operator errors associated with using modern video inspection equipment outweigh the cost of a video measuring system.

The VisionGauge® Standalone Inspection and Measurement System is a versatile solution for your automation and inspection needs. Precise and convenient, the standalone model serves as a drop-in device for robot-controlled, automated cells. Combined with ease of installation, this system can solve a vast array of of applications and works well for general purpose inspections.

Contact Us for More Information

Video measuring system costs depend on your supplier and the customizations required to solve your application, such as the size, magnification, and type of illumination. Choose a video measuring system supplier who understands your business’s needs and offers quality control solutions to properly solve your application. VISIONx, Inc. strives to provide our customers with cost-effective inspection equipment with the best technology available. We’ll work with you to choose equipment, customize it to match industry-specific requirements, and provide maintenance and support to ensure your video measuring system continues to function as expected. Our Application Support is able to assist with recommendations for improvement, future reconfigurations, and solving new applications with the same system.

Contact us with your application details to learn more about the VisionGauge® Standalone Inspection and Measurement System.

500 Series Digital Optical Comparators

About Our 500 Series Optical Comparator

The VisionGauge® Digital Optical Comparator is a fully digital device that works as a reliable drop-in replacement to the traditional optical comparator. It offers convenience for users, allowing you to work directly with your part’s CAD file without the need for overlays, templates, or Mylars™.

This digital profile projector is designed with patented technology and sub-pixel accuracy. It lets you perform accurate and precise measurements and efficiently compare parts against their respective CAD drawings. This streamlined functionality effectively shortens the inspection process without compromising precision and accuracy.

The 500 Series is an automated optical comparator that features a robust and extremely easy-to-use technology. It’s equipped with the VisionGauge® system’s patented CAD Auto-Align™ and CAD Auto-Pass/Fail™ programs, making it easy to use directly on the shop floor. The CAD Auto-Align™ tool automatically aligns the overlay for a fully automated CAD-to-part comparison. Meanwhile, the CAD Auto-Pass/Fail™ tool computes and displays any deviation from nominal and determines out-of-tolerance measurements in real time. In addition to proprietary patented technology, it also has our patent-pending Tooth Checker™ tool to accurately locate roots and crests in toothed parts.

digital optical comparator automatic part alignment

The full digital capability minimizes the device’s margin of error and leaves no room for operator mistakes or operator-to-operator variation. It can also collect complete electronic documentation without human intervention. These include all measurements, pass/fail results, statistics, and high-resolution images of every part inspected.

Advantages of Our Profile Projector

The 500 Series Digital Optical Comparator is a powerful and versatile device suitable for measuring both small and large parts. Unlike traditional optical comparators, this machine offers numerous benefits at a competitive price. Benefits include the following:

  • High-contrast image with sharp edge profiles for a detailed view
  • High level of accuracy
  • Excellent optical depth of field capability
  • Longer optical working distance between the part and the lens
  • LED illumination for stable lighting
  • Comprehensive tools for advanced analysis and reporting
  • Runs fully automated measurements
  • Automatically sends data to Excel and other external applications
  • Space-saving and portable
  • Features a rolling cart configuration for easy movement without re-calibration
  • Automated work cell integration
  • Options to control via TCP/IP and RS-232 communications
  • Automated CAD comparison beyond the optical field-of-view
  • Barcode reader and joystick interface
  • Extremely intuitive software
  • On-screen measurements
  • Quick and easy annual calibration procedure
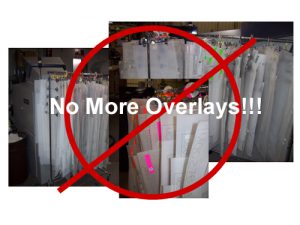
Digital Optical Comparators work directly with your CAD data. No more overlays.

500 Series Additional Features

The 500 Series VisionGauge® Digital Optical Comparator boasts unique features. Some of its cutting-edge features include the following:

  • Standard 12″ travel X-axis stage with a 0.5-micron resolution encoder
  • Protective bellows around the 6″ travel Y-axis column
  • Highly accurate crossed-roller movements for all 3 standard axes
  • High load-carrying capacity
  • Programmable and computer-controlled illumination
  • Power focus and auto-focus capabilities in single or multi-magnification configurations
  • Complete and ready-to-run Windows-based solutions
  • Network-ready upon delivery
  • Standard dovetail mounting grooves
  • Customizable workholding and fixtures
  • Optional high-resolution LASER module
a stainless steel table and a hose attached to it

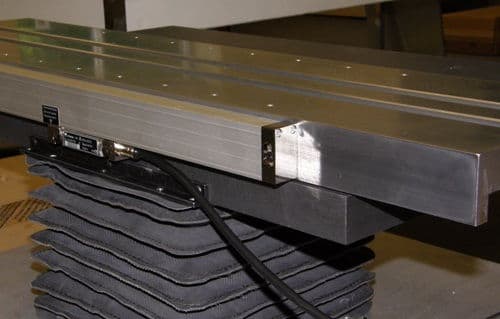
Standard 12″ travel X-axis stage with protective bellows around the 6″ travel Y-axis column. All 3 axes (X, Y and Z) feature high-accuracy crossed-roller movements for optimal linearity and positional repeatability.

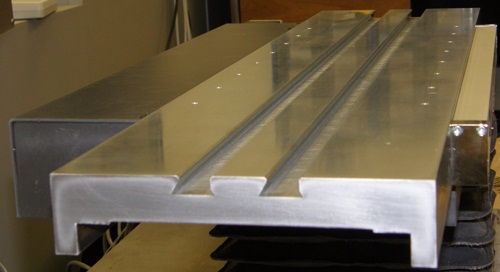
Hard chrome plated X-axis stage, made of hardened tooling steel and with dual standard dovetail grooves for easy part fixturing on a Digital Optical Comparator

Hard chrome plated X-axis stage, made of hardened tooling steel and with dual standard dovetail grooves for easy part fixturing.

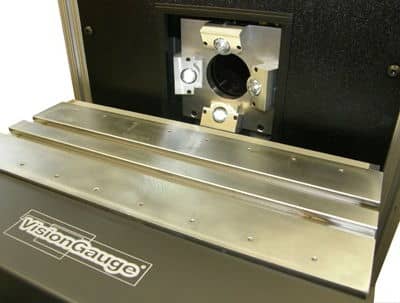
Reflected (i.e. front) illumination module or optional Octant-based Reflected Illumination

500 Series Configurations Gallery

  • a visiongauge machine with a monitor to the top right of it
    VisionGauge® Digital Optical Comparator 500 Series Vertical Configuration

Find the Right Digital Optical Comparator for Your Needs

The 500 Series VisionGauge® Digital Optical Comparator is a high-performing device designed for the high-accuracy inspection of a variety of parts, whether small, large, light, or heavy. This reliable inspection equipment is available in vertical and horizontal configurations and caters to a wide range of industrial applications.

Learn more about the 500 Series digital optical comparators or other devices from the VisionGauge® digital comparators collection. Contact us to request pricing details or for additional product information.

300 Series Field-of-View Systems

About Our 300 Series Optical Comparator

The 300 Series VisionGauge® Digital Optical Comparator is a Field-of-View system that is ideal for measuring parts up to 5.5″ x 3.3″ in size. This versatile device also features an extended depth-of-field to accommodate tall parts as high as 4″, as well as a long working distance to provide users with ample clearance and room to work between the part and the lens.

This small parts digital optical comparator produces a high-resolution image for fine and detailed inspections. It has three different types of LED illumination as standard features — a collimated back, front on-axis or “bright field,” and front off-axis or “dark field.” The cutting-edge lighting system produces crisp images and delivers excellent results even when working with hard-to-image materials and tricky shapes. The high-resolution precision optics are ideal for parts with translucent and reflective surfaces, as well as those with complex geometry and deep holes.

Like other VisionGauge® systems, the 300 Series is designed with capabilities that run on Windows-based solutions. This machine is delivered network-ready to minimize downtime and ensure you’ll be up and running from day one. Our team will also provide NIST-traceable calibration to certify the equipment meets industry standards. We complete the service with an on-site installation and training in device operation.

Features of the 300 Series Small Parts Inspection System

This 300 Series VisionGauge® Digital Optical Comparator has a functionality similar to the 500 Series instrument. The primary differences between these two high-performing devices is that the 300 Series caters to smaller parts and does not include a moveable stage. Built with a convenient desktop configuration, this device features an intuitive operation interface that makes it easy to learn and operate. The small footprint makes it suitable for use in the quality control lab and shop floor. Other innovative features include:

  • Patented CAD Auto-Align™ and CAD Auto-Pass/Fail™ technology for efficient comparison within seconds
  • Patent-pending Tooth Checker™ tool for locating crest and root location
  • Real-time computation and display of out-of-tolerance areas and deviations from nominal
  • Operator-independent functionality
  • All-purpose mounting hole pattern for flexible part fixturing
  • Extremely fast and easy to set up and use
  • No operator-to-operator variation
  • No overlays, templates, or Mylars™ necessary
  • Fully automated measurements
  • Joystick and barcode reader capability
  • Accurate to +/- 0.0001″ (2.5 μ)
  • Ultra-high-resolution precision optics
  • Automatic image and data collection
  • Built-in Statistical Process Control
  • No moving and consumable parts

Overlay before CAD Auto-AlignmentOverlay after CAD Auto-Alignment

Proprietary CAD Auto-Align™ and CAD Auto Pass/Fail™ tools work almost instantly
and produce very accurate, operator-independent results
Diameter FOV measurement on a VisionGauge Digital Optical Comparator
Fast and accurate automated measurements
FOV distance measurement on a VisionGauge Digital Optical Comparator
Reverse Engineering a part on a VisionGauge Digital Optical Comparator
Reverse Engineer a part...
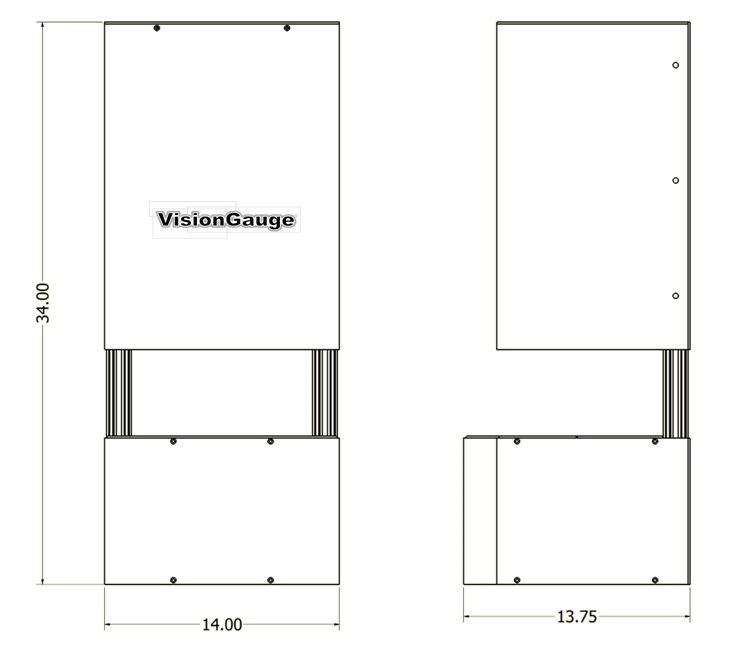
Desktop Configuration Dimensions of a 300 Series VisionGauge Digital Optical Comparator
Main unit overall dimensions (Model # VG300DOC-30V-20X)
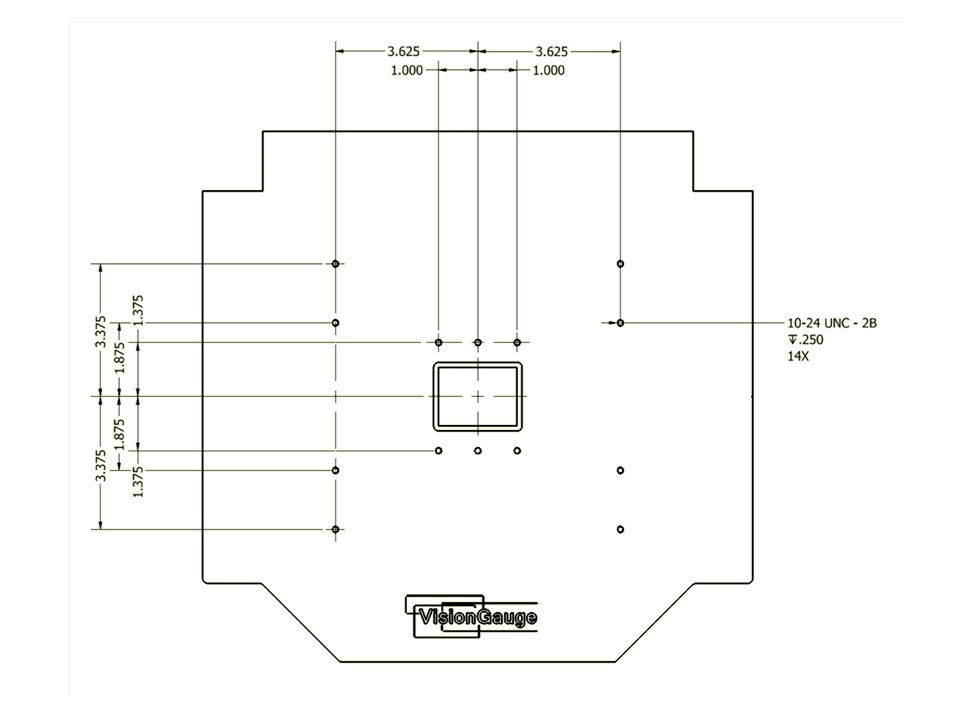
Desktop Configuration Base Plate Dimensions of a 300 Series VisionGauge Digital Optical Comparator
All-purpose mounting hole pattern for easy & flexible part fixturing (in the case where parts are to be fixtured)
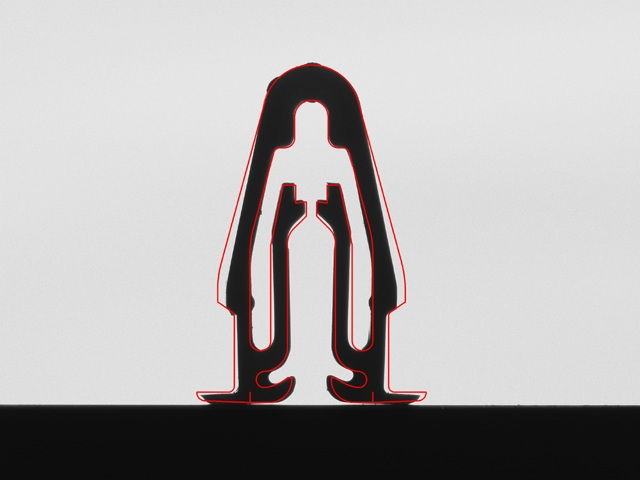
Quickly and easily check flexible and other hard-to-inspect parts against their CAD data on a VisionGauge Digital Optical Comparator
Quickly and easily check flexible and other hard-to-inspect parts against their CAD data

Learn More About Our Small Parts Digital Optical Comparator

Checking, measuring, and inspecting small parts can be challenging — but not with the 300 Series VisionGauge® Digital Optical Comparator. Specially designed for inspecting small parts, this device offers the efficiency and convenience of other desktop optical comparators in a compact frame. Featuring VisionGauge® proprietary patented and patent-pending technology, this tool is a reliable partner for a comprehensive range of industrial applications. The digital functionality delivers precise measurements and innovative computations for a streamlined inspection process. Instant results and automated functions make it an ideal choice for high-throughput applications.

Request more information on devices in the VisionGauge® Digital Optical Comparator collection. Contact our experts for additional questions and system pricing.

400 Series Desktop Inspection and Measurement Systems

400 Series Horizontal Desktop Digital Optical Comparator with monitor

400 Series Desktop Optical Comparator

The 400 Series VisionGauge® Digital Optical Comparator is a state-of-the-art inspection and measurement device. This desktop optical comparator is suitable for low-throughput applications.

The optical inspection system is designed with vertical and horizontal configurations and features manual stage movement across three axes for operator-driven reliability. Despite its compact size, this high-performing device offers high resolution, precision optics, and computer-controlled, ultra-bright LED illumination for sharp and clear images. It comes with a single high-resolution monitor that allows a full view of the entire image.

The 400 Series is a cost-effective inspection and measurement system with a complete set of features. It’s equipped with all the advanced and patented software capabilities VisionGauge® systems, including:

  1. CAD Auto-Align™: This patented groundbreaking tool automatically aligns a CAD overlay to a specific part during inspection. Within seconds, it can produce repeatable results even without operator supervision, drastically reducing inspection time and improving measurement accuracy.
  2. CAD Auto-Pass/Fail™ technology: The CAD Auto-Pass/Fail™ tech automatically determines whether a part is within tolerance or deviates from nominal in real time and with great accuracy.
  3. Tooth Checker™: Designed to check parts with teeth, the patent-pending Tooth Checker™ tool automatically locates the crests and roots in the inspected part’s teeth or threads. It helps determine if the parts fall within their specified tolerance band. This tool also works for parts larger than the field of view and can be used in manual and fully automated modes.

Advantages of Our Desktop Inspection and Measurement System

This desktop optical comparator is a versatile machine equipped with automatic data collection technology. It can obtain images, gather data, and generate reports without operator-to-operator variation. It’s a convenient tool offering advantages over traditional comparators. These advantages include:

  • Small footprint: This device features a compact tabletop structure that can accommodate a variety of parts and fixtures. Its space-saving design makes it ideal for inspections conducted within the shop floor or manufacturing facility.
  • User-friendly interface: The device is built with an intuitive operator interface that ensures accurate results while remaining easy to set up and use.
  • Flexibility: Single magnification and precision optics, combined with the extended depth of field, allow a long working distance for maximum flexibility.
  • Convenience: This device’s built-in statistical process control and data exchange capabilities make reporting results easy and convenient. It automatically prepares reports on all collected images, measurements, and statistics for thorough documentation.

Features

Our optical inspection systems are continuously being improved with updates. The constant innovation enables us to cater to a wide range of industrial inspection applications with enhanced speed and accuracy. Our device’s features include:

  • The VisionGauge® extensive set of software tools for accurate measurements and image analysis
  • 12″ x 12″ measurement envelope
  • Manual storage movement and inspection on 3 axes
  • 0.25-micron resolution encoders on the X and Y axes
  • Ultra-bright, repeatable LED computer-controlled illumination
  • Robust design with no consumable parts
  • Optional LASER module for Z-axis height measurements
  • Customizable optical configurations and workholding
CAD Auto-Align™, CAD Auto-Pass/Fail™ result on the VisionGauge Digital Optical Comparator
Patented VisionGauge® CAD Auto-Align™ and CAD Auto-Pass/Fail™ tools provide fast, accurate and operator-independent results
Profile tolerance Pass/Fail on the VisionGauge Digital Optical Comparator
The perfect solution for checking profile tolerances!
High-accuracy measurement tools on a Digital Optical Comparator
The system has a broad set of high-accuracy measurement tools
back-illumination of a part on a Digital Optical Comparator
front-illumination of a part on a Digital Optical Comparator
Both front- and back-illumination are available. Works well on different surfaces and materials, including metals & plastics

Discover Our Desktop Optical Comparators

When it comes to optical inspection technology, the 400 Series VisionGauge® Digital Optical Comparator leads the industry with its high-performing features. This cost-effective device is built with advanced capabilities and benefits for efficient quality control in various manufacturing operations. It’s suitable for a wide range of industrial applications. Our system simplifies checking parts, obtaining Pass/Fail results, and collecting detailed reports for optimized inspection processes.

Contact us for the prices of our benchtop optical measurement system, or request more information about the 400 Series VisionGauge® Digital Optical Comparator below.

700 Series 5-Axis Inspection and Measurement Systems

The 700 Series VisionGauge® Digital Optical Comparator is a 5-Axis Inspection and Measurement System that is widely used by manufacturers across a broad range of industries (including aerospace and power generation) to check EDM- and LASER-drilled holes and slots. It is the ideal solution for the automatic inspection of parts with complex geometries. The 5 axes of motion (X, Y, Z, Rotary, Tilt) allow parts to be secured to an industry-standard chuck and positioned accurately to view the part from all sides and angles.

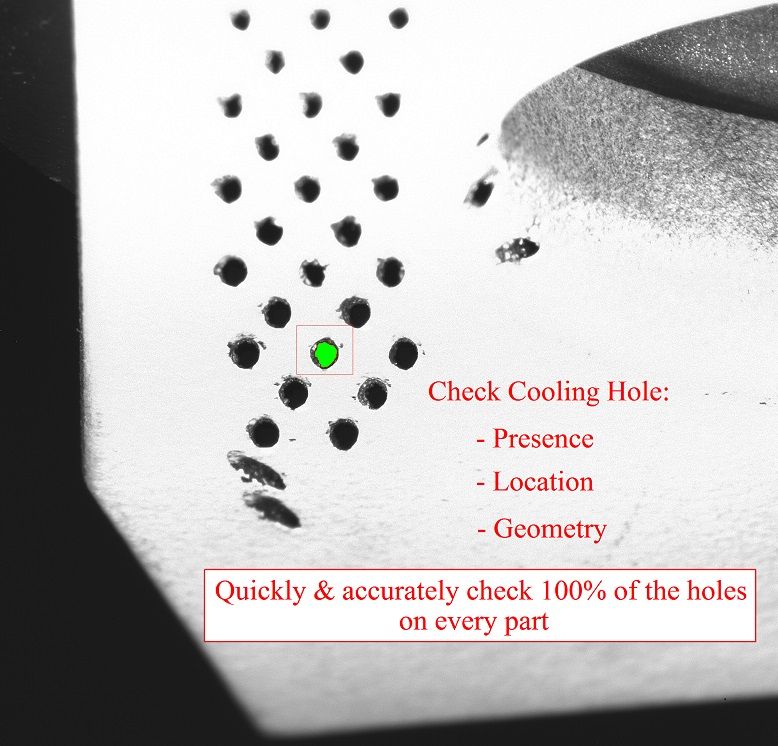
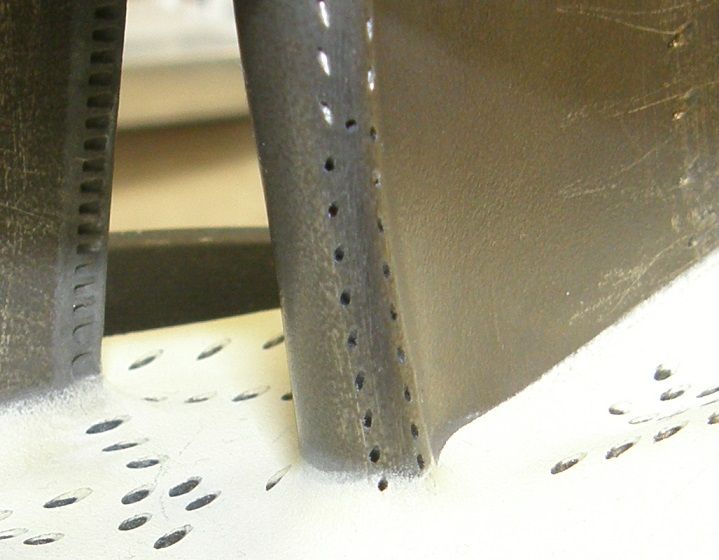
Cooling Hole Inspection - Verifying Presence, Shape, and Location

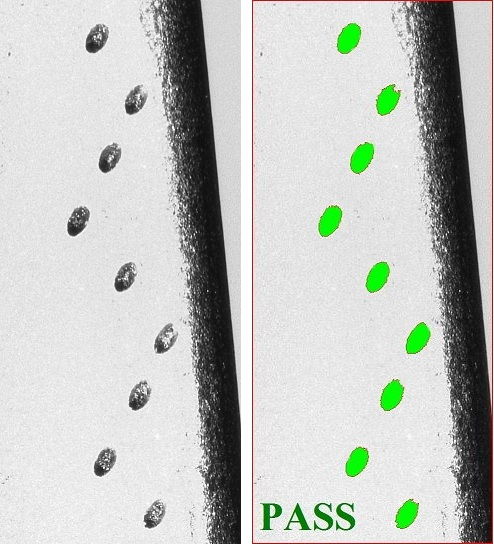
The system is able to automatically verify hole presence and accurately measure hole location. The 700 Series VisionGauge® Digital Optical Comparator is adaptable and supports both round and shaped holes, different surface types with different reflectivity, different viewing angles, etc… VisionGauge® OnLine’s advanced toolset permits programs to locate features with high accuracy and automatically obtain results with a Pass/Fail conclusion based directly on the part’s CAD file specifications. The program can also output the hole offsets, which can then be used to modify EDM drilling programs.

The system provides extremely powerful and innovative software tools for robust component detection, including specialized tools well suited to deal with burrs and splatter. The “Part Reorientation” tool provides the ability to execute full 6-point iterative alignment, and VisionGauge®’s fast and intuitive ‘Operator Review’ mode allows operators to quickly revisit any out-of-tolerances areas. VisionGauge® also supports automatic image and data collection for complete electronic documentation and data-exchange.

The VisionGauge® Digital Optical Comparator is a very cost-effective, perfectly adapted solution for checking EDM- and LASER-drilled holes and slots. It is rapidly becoming the new standard in the industry!

measurement and inspection of EDM- and LASER-drilled drilled holes and slots
Automatically verify hole presence and accurately measure cooling hole locations.

Advantages of the 700 Series VisionGauge® Digital Optical Comparator

You will find many benefits to using the 700 Series 5-Axis Inspection and Measurement System during the manufacturing process compared to traditional devices or other computerized vision measuring systems. This system goes well-beyond simply producing a report on each part and can significantly enhance the quality of your shop’s inspection operations.

Advantages of incorporating the 700 Series VisionGauge® Digital Optical Comparator into your shop include:

  • Quickly, easily, and accurately inspect 100% of the holes on your parts.
  • The system is easy to program, allowing you to use your CAD data directly and hole positions from your drilling programs.
  • The operator interface is intuitive, including a barcode-reader and joysticks.
  • The system supports both round and shaped holes on various surfaces.
  • Hole offsets can be output, providing feedback to EDM drilling programs.
  • The mounting system allows parts to go directly from the EDM drilling machine to the inspection system without re-fixturing – a quick and easy process that minimizes stack-up error.
  • Our system can be equipped with the same working envelope as your EDM drill.
  • The system is capable of performing 6-Point Iterative Alignment.
  • Check holes one at a time, looking straight down the hole’s nominal axis, or check multiple holes at once viewing them at an angle (depending on your inspection speed requirements and your part’s coating characteristics).
  • The system’s dual-source illumination module provides lighting at different angles of incidence (i.e. both near-vertical and low-oblique) for wide applicability across a very broad range of part geometries.
  • Powerful, adaptive feature-detection software tools can accurately locate drilled holes on different surface types (different reflectivity characteristics, different viewing angles, etc.).
  • VisionGauge®’s advanced toolset can easily deal with burrs and splatter.
  • Automatically create reports and collect measurements, statistics, images and other data for complete documentation.

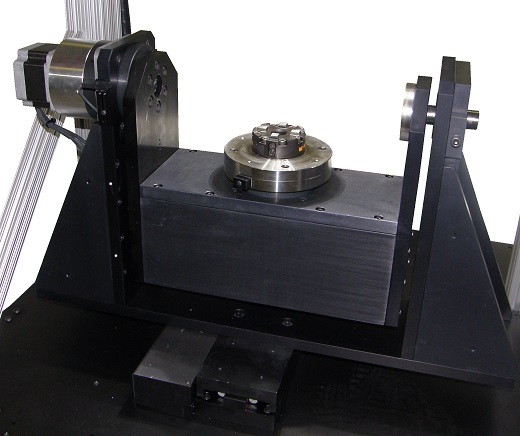
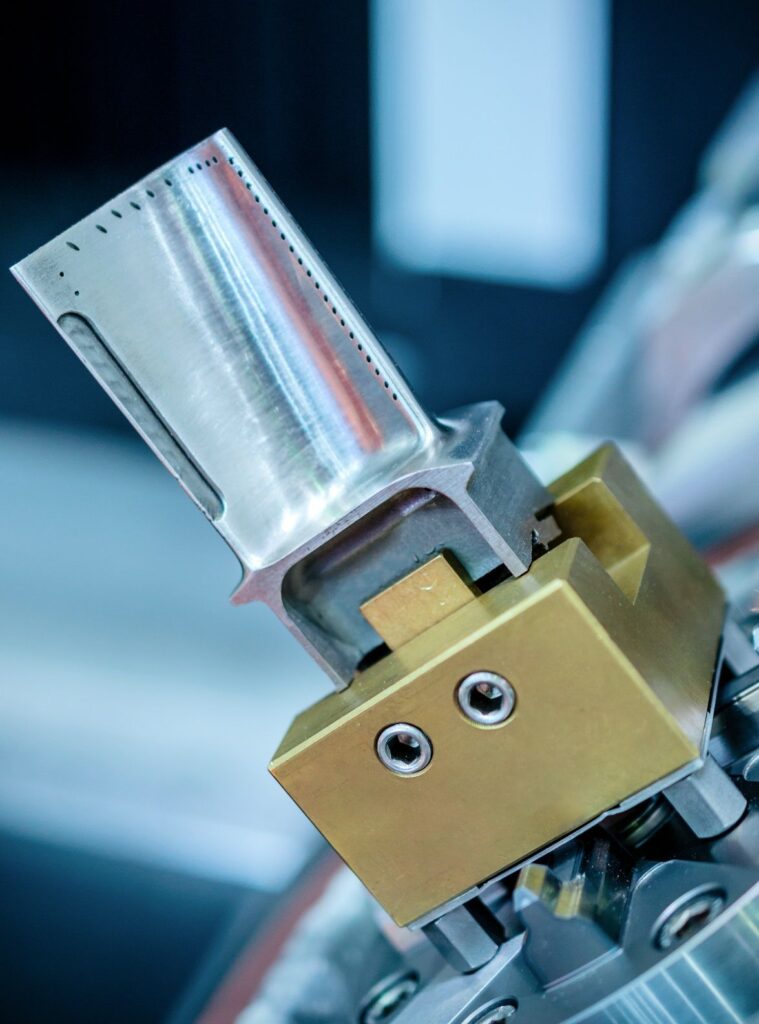
The system comes with an industry-standard chuck mounted on the system’s double-rotary trunnion assembly.

Other mounting systems are also supported.

The new "Gen 2" trunnion setup for the double-rotary assembly of the 700-series VisionGauge Digital Optical Comparator.

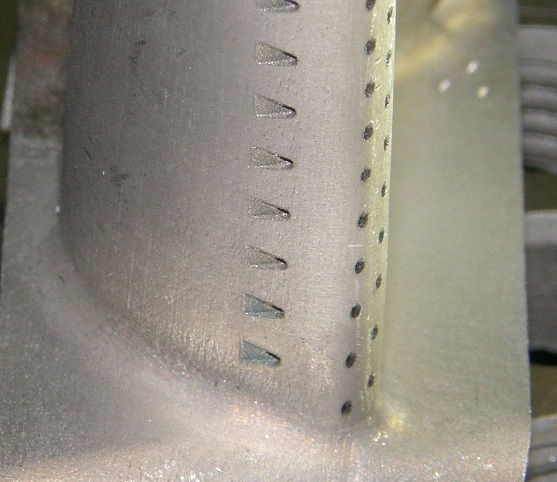
These systems are ideal for aircraft engine and gas turbine blade cooling holes inspection and measurement

Features

The 700 Series VisionGauge® Digital Optical Comparator uses innovative tools and software to optimize quality control and reduce operator error. Our solutions have quality features that make comparators like the 700 Series 5-Axis Inspection and Measurement System stand apart from traditional inspection equipment.

Additional features include:

  • Motion on five axes (X, Y, and Z axes, plus rotary and tilt) to inspect complex parts
  • User-friendly interface with direct CAD-to-Part comparison
  • Includes VisionGauge®’s vast selection of advanced feature-detection and measurement tools
  • High-resolution optics and imaging
  • Ultra-bright computer-controlled LEDs present stable illumination with sharp contrast
  • An extended depth of field allows everything to be perfectly in focus, regardless of the part’s geometry, even in areas of high curvature.
  • A long working distance gives lots of clearance between the optical system and the part to easily accommodate large and unusually-shaped parts.
  • The system has a robust shop floor design.
  • Automatic reports, image collection, statistics, data collection, and data exchange
  • Intuitive “Operator review” mode to easily evaluate inspection program results
  • The system comes with an industry-standard chuck mounted on the system’s double-rotary stage assembly, with other mounting systems also supported.

VisionGauge® Digital Optical Comparators are the only industrial vision systems that are fully digital, entirely automated, and outfitted with the groundbreaking CAD Auto-Pass/Fail™ and CAD Auto-Align™ capabilities.

a visiongauge system sat next to a computer
The 700 Series VisionGauge® Digital Optical Comparator 5-axis inspection and measurement system is the ideal solution for the automatic inspection of parts with complex geometries. The Extended 24" x 24" x 24" travel machine with trunnion configuration for big and heavy parts is shown above with a single monitor.
Cooling hole location/detection on coated and un-coated part surfaces

Ideal for both coated & un-coated parts

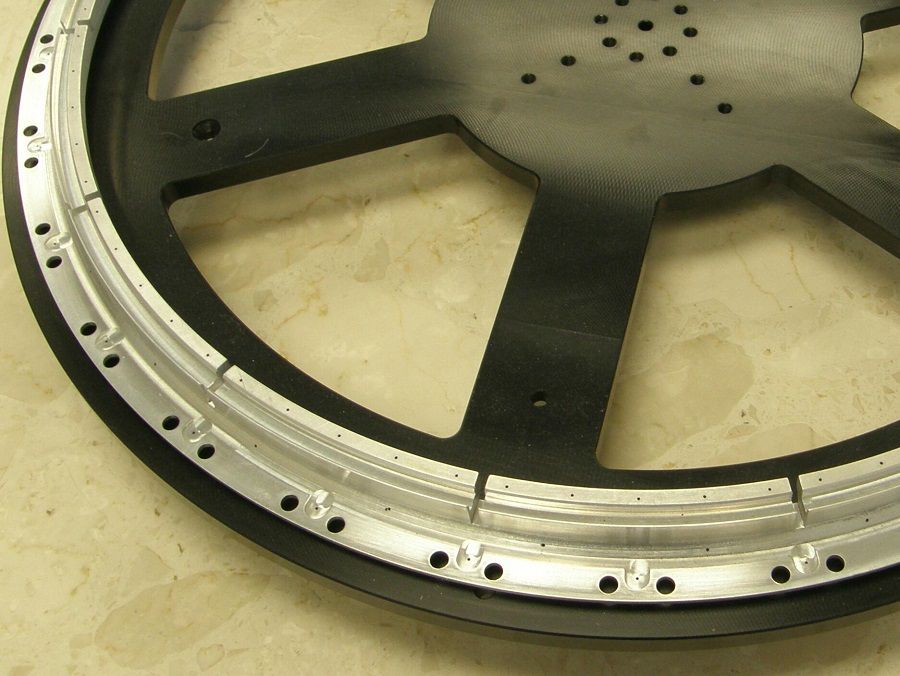
Ring with cooling holes
Ring with cooling holes. For the larger rings, it is typical to use an extended-travel 700 series system to check the hole presence and measure the hole location and geometry.
Adapted feature-detection on unique surfaces

Powerful “adaptive” feature-detection software tools are able to accurately find and locate holes on different surfaces, with different reflectivity, at different viewing angles, etc…

What Are Machine Vision Inspection Systems?

Vision-based inspection systems are cost-effective solutions for maintaining quality control that involve measuring and inspecting images of manufactured parts. They are commonly employed for industrial and manufacturing applications of all types. Modern industrial vision systems have the ability to generate a Pass/Fail report according to the part specifications programmed into the inspection process, alongside more complex insights.

Computer-aided design (CAD) is often the guiding framework for dimensional measurement using vision systems. VisionGauge® machine vision inspection systems, including the 700 Series 5-Axis Inspection and Measurement System, compare a part directly to its CAD/DXF data and automatically produces a Pass/Fail result and detailed measurement report.

Learn More About Industrial Vision Systems

Manufacturing high-quality parts requires close attention to how well the product complies with its design. Defects impact businesses in any industry, but in high-risk industries like aerospace, medical device manufacturing, military and defense, and others, parts must Pass with tight tolerances. Manufacturers conduct quality inspection and measurements using vision systems to ensure their parts are within specifications.

The VisionGauge® Digital Optical Comparator is the most efficient and accurate way to compare a manufactured part to its CAD file. 700 Series 5-Axis Inspection and Measurement Systems are designed for parts with complex geometries in industrial and manufacturing applications with strict quality standards, such as aircraft engine manufacturing. From engines to cooling holes in gas turbine blades, these industrial vision measuring systems conduct reliable inspections and measurements.

Contact us for more information about the 700 Series 5-Axis Inspection and Measurement System or our other computerized vision measuring systems.

VisionGauge® Digital Optical Comparators

The Fastest, Easiest, Most Accurate Way to Compare a Part to a CAD File™

Optical inspection sets the standard for part verification in major manufacturing industries in today’s high-tech world. We assist leaders in all types of businesses by offering custom automated optical comparators. With increased speed, agility and reliability, our systems allow you to compare parts directly to their CAD data while accurately and efficiently completing inspections and digital optical measurements.

Improving Your Operation’s Production and Efficiency With Digital Optical Comparators

Our VisionGauge® Digital Optical Comparators streamline your manufacturing process by capturing images of manufactured parts and automatically comparing them to their CAD drawings. This ability means you can reliably confirm whether a component is within spec or catch production flaws before they go out the door. These systems provide stunning accuracy, a necessary element in high-demand industries like medical manufacturing, aviation, aerospace, electronics and pharmaceuticals.

Learn about the various applications of our digital profile projectors and see if they’re right for your industry’s quality control.

a visiongauge machine with a small monitor on top
Auto Pass/Fail results using CAD entity segments on a VisionGauge Digital Optical Comparator

How VisionGauge® Digital Optical Comparators Work

VisionGauge® Digital Optical Comparators measure product consistency by comparing parts directly to their CAD file. This process is a quick, highly-accurate way to check for defects and verify all components conform to quality standards.

Digital profile projectors are precise and intuitive, delivering high-quality results in less time than traditional optical comparators. These machines are easy to use and because they can be fully automated, they operate swiftly and reliably. They also offer a convenient way to streamline inspections, enabling you to speed up operations, increase throughput, and eliminate operator error. Learn more about how digital optical comparators work!

How a Digital Optical Comparator Can Benefit Your Business

VISIONx, Inc.’s digital profile projectors offer reports, charts, statistics and more. In addition to being fully digital, our inspection systems glean data straight from CAD drawings, saving time by making inspections simpler and easier to run. VISIONx’s update to traditional optical comparator machines will capture, qualify and report comparison data at the click of a button. Additional benefits of our systems include:

Finding the Right System for Your Unique Application

We have multiple digital profile projectors for sale. Our VisionGauge® Digital Optical Comparators use the latest technology and measuring tools to deliver high-quality images, capture reliable data and help you maintain quality control policies. We offer digital comparators in horizontal and vertical configurations to optimize your measuring processes:

  • Vertical optical comparators: Vertical models contain a glass insert on the stage for parts placement. Ultra-bright lighting illuminates the part from beneath the glass, displaying the profile for inspection. These designs are ideal for applications involving objects that sit flat on the glass, like plates or other flat-shaped components.
  • Horizontal optical comparators: Horizontal optical comparator machines contain an X-axis stage with premium steel, chrome plating and highly durable dovetail mounting grooves for quick and repeatable part placement. The component sits on the stage, perpendicular to the lens and Z-axis. While vertical comparators are ideal for flat parts, horizontal models work well for most other geometries.

If you upgrade an existing optical comparator to a VisionGauge® design, the component’s presentation to the camera will remain the same, meaning replacement is easy in the same horizontal or vertical configuration.

View Our Digital Optical Comparator Models

300 Series

VisionGauge® Digital Optical Comparator 300 Series / Field-of-View Systems 5x configuration.

Our 300 Series Field-of-View Systems can help you increase productivity if you manufacture smaller parts for electronics, medical, or similar products. The design boasts an extended depth for objects as high as 4 inches and an extended working area, providing plenty of clearance between the lens and the part.

Several features include:

  • Small desktop system
  • User friendly
  • CAD Auto-Align™
  • CAD Auto Pass/Fail™
  • Quality image analysis
  • High-accuracy measurements

400 Series

The 400 Series Desktop Inspection and Measurement System is a compact digital optical comparator machine with incredible accuracy and reliable digital optical measurements. With manual movement across three axes, the 400 Series is ideal for lower-volume applications that require precision measurements.

Features of the 400 Series include:

  • Compact digital optical comparator machine
  • CAD Auto-Align™
  • CAD Auto Pass/Fail™
  • Tooth Checker™ tools
  • LED illumination
  • 3-axis manual stage motion
  • Multiple configuration options
  • Speeds up the review of small parts
a visiongauge machine sat next to a small computer and keyboard

500 Series

a visiongauge machine with a small monitor on top
a visiongauge machine with a monitor to the top right of it

The 500 Series Digital Optical Comparator earns its name by setting the standard for optical quality control equipment everywhere. This machine is the most powerful digital optical comparator on the market and can handle almost any demand thanks to its high efficiency, user-friendly design and precision optics.

Features include:

  • High product volumes
  • Great for small and large parts
  • Automated measurements and CAD comparisons
  • Versatile reporting options
  • CAD Auto-Pass/Fail™

500 Series Super-Extended-Travel Configuration

The Super-Extended-Travel configuration of the 500 Series VisionGauge® Digital Optical Comparator delivers reliable, high-accuracy performance for measuring large and heavy parts. The innovative design provides optimal rigidity and minimizes mechanical deflection for various components, including parts in the power generation and gas turbine industries.

Examples of the primary features include:

  • Ideal for large and heavy parts
  • 60 inches of travel
  • Supports loads of up to 300 lbs
  • Compare components beyond the optical field-of-view
a visiongauge machine sat next to a computer on a tall black stand

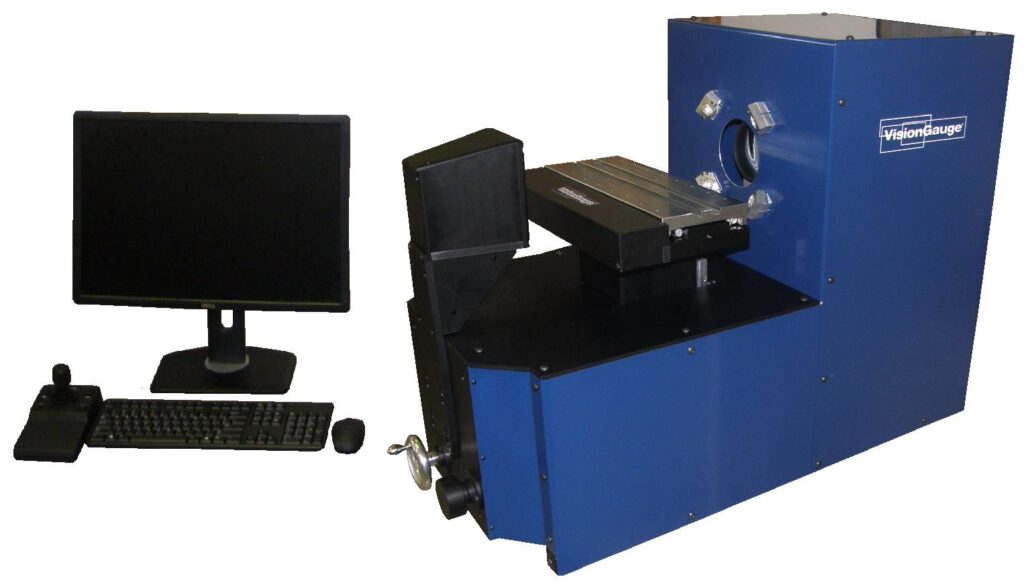
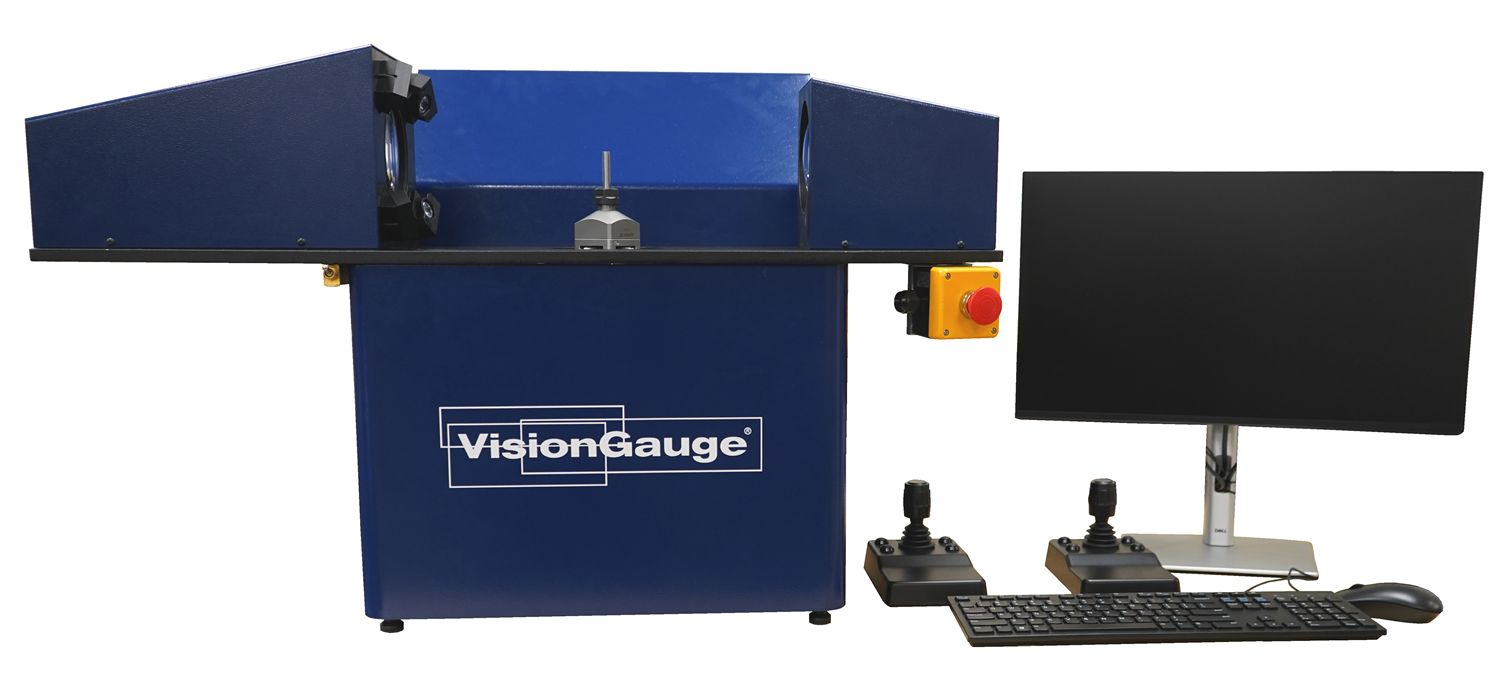
600 Series Compact Desktop System for Turned Parts

a visiongauge machine sat next to a computer setup

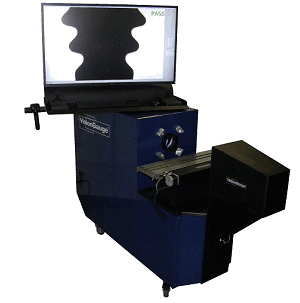
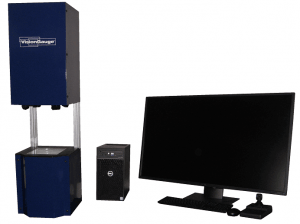
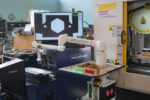
The 600 Series VisionGauge® Inspection and Measurement Systems are designed to check turned and rotationally symmetrical parts in a compact desktop format. The system is very flexible and available with a wide range of customizable workholding setups for crisp surface feature inspection across a wide range of industries.

600 Series features include:

  • Inspect and measure turned and rotationally symmetrical parts, such as screws, bolts, shafts, and more…
  • 2 motorized encoded axes of motion – rotation and vertical movement of the part
  • Measure turned parts with optical accuracy better than +/- 0.00015″
  • Includes VisionGauge® advanced software toolset and patented technology

700 Series

a visiongauge system sat next to a computer

Our 700 Series 5-Axis Inspection and Measurement System offers the ultimate solution for work with more intricate electronic or mechanical parts. This measurement system is optimal for complex aviation, aerospace, and power applications.

Features of the 700 Series comparator include:

  • Captures images on five axes, including X, Y, Z, rotary and tilt
  • Crystal clear resolution
  • View reports based on CAD/DXF file comparisons, part feature locations and measurements
  • Fully Automated
  • Optimal for complex applications

Standalone System

If you are looking for an inspection system ready to integrate into your existing process that can take on your most complicated automation applications, you may benefit from the VisionGauge® Standalone Inspection & Measurement System. The Standalone’s design leverages precision optics and advanced software to provide greater efficiency, accuracy, and speed compared to older models.

Product features include:

  • Ready to integrate into your existing process
  • Flexibility to configure in a variety of orientations
  • Features its own control cabinet
  • User-friendly interface
  • Fits into any existing automated cell
  • A versatile all-purpose option
The VisionGauge StandAlone Inspection and Measurement system.

Disk Inspection System

a visiongauge machine sat next to a computer on a stand

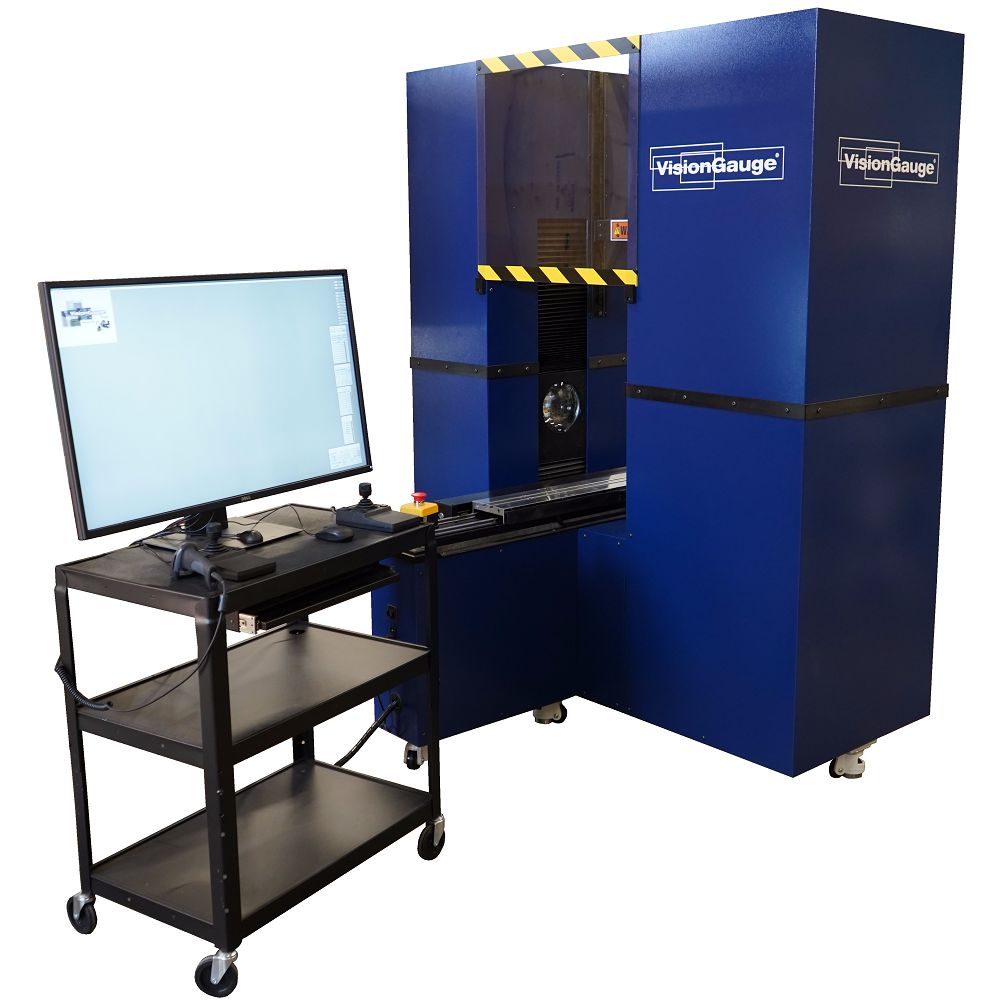
The VisionGauge® Disk Inspection and Measurement System is the ideal solution for companies that manufacture and inspect turbine disks. Our resources will allow you to detect flaws and confidently turn out higher-quality turbine disks.

Examples of features include:

  • Inspect large or small disks
  • Fully automated
  • Measure and verify faster
  • Five axes of motion
  • View disk slots from all angles
  • Equipped with our software
  • LED computer-controlled illumination
  • Advanced measuring tools

Contact Us For More Information

Our VisionGauge® Digital Optical Comparators allow you to speed up your measurement and verification operations, helping you establish a more effective, accurate inspection process for your business. If you’re looking for a system that meets specific job requirements, we also have the inspection technology to offer customized solutions and multiple configuration options.

Please browse our measurement tools and systems to find the perfect solution for your unique application. If you want to learn more about how partnering with the industry’s leading digital optical comparator manufacturer can benefit your business, our experts can guide you. Contact us online today for additional information or to find a purchasing location to buy optical comparators near you.

You can also check out our frequently asked questions page for more information.

VisionGauge® Digital Optical Comparator / Profile Projector Options: