The aerospace and aeronautics industry has strict requirements for manufacturing parts to ensure that every component will be able to deliver maximum safety and optimal performance. That is why it is essential to have a rigorous quality assurance system in place to verify that you have attained the proper aerospace parts measurements before moving on to the next production stage — and that’s where VisionGauge® Digital Optical Comparators represent an invaluable investment. These advanced systems offer fast and effective inspection capabilities so you can maximize your productivity.
At VISIONx, Inc., we develop intelligent solutions to streamline quality control processes. Our VisionGauge® systems allow automated aerospace parts inspection so you can continue with other tasks. These devices collect data from the results and product reports to determine whether there are faults or inconsistencies. VisionGauge® Digital Optical Comparators support these and other applications.

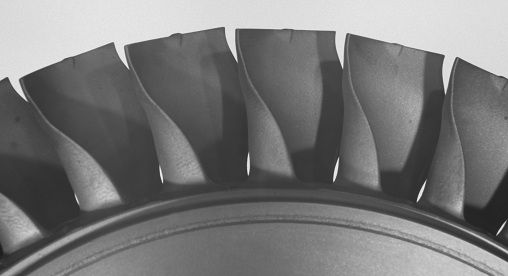
Turbine disks and broach slots have complex designs and tight tolerances. It’s crucial that each disk slot aligns perfectly with the turbine blades, so each shape and surface must adhere to strict standards. With VisionGauge® Digital Optical Comparators, you can inspect 100% of normal and angled turbine disk slots, boosting your productivity.

Cooling holes prevent various aerospace systems and components from overheating, so it is essential for these holes to be the correct size and in the right location. These holes are often in the turbine blades, where they effectively transfer cool air to hot regions. Checking these holes manually wastes your valuable time, so our VisionGauge® aerospace manufacturing inspection systems check several thousand holes simultaneously to ensure each meets your precise requirements.

Micro holes control the flow of gas, air, or particles throughout aerospace systems. There are often thousands of tiny holes on a single surface, and they all have to be precisely the right size. Aerospace parts quality control inspections also confirm the number of holes to ensure they match the original designs. Our VisionGauge® Digital Optical Comparators automatically inspect each micro hole quickly and accurately, preventing unnecessary project delays.

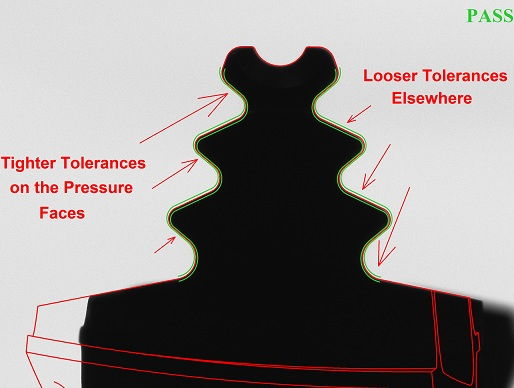
Turbine blade roots increase the efficiency of rotating systems. If one of the components is faulty, it could lead to energy production issues, decreasing the system’s overall efficiency. Our VisionGauge® systems are capable of directly comparing turbine blade fir tree root forms to their CAD drawings without overlays for a faster turnaround.


Are you interested in streamlining your inspection process with VisionGauge® Digital Optical Comparators and optical measuring systems? As your vision inspection system manufacturer, we’re available to provide support at any time, so browse our selection of products or contact us online today.
Learn More