VisionGauge® OnLine version 12.73 is available for download.

VisionGauge® OnLine version 12.73, dated October 26th, 2017, is available for download.


This update includes several new features:


– Users can specify multiple motorized axes that will retract to either the positive or negative limit switch before the 2D XY Stage Mapping correction is carried out upon startup of VisionGauge® Online. This is particularly useful for systems that may have parts mounted that could collide with the system during the initial homing of the X and Y axes.

To configure this feature, access the Motion Control Toolbox Settings menu and select “Startup”.
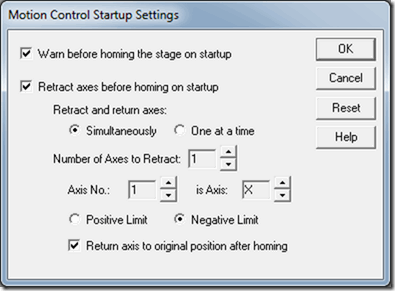
Retract axes before homing on startup of VisionGauge OnLine

This window allows you to configure multiple axes that should retract before the X and Y axes begin homing. You can specify whether the axes all retract at the same time or if they retract one by one in the order specified. Each axis will retract to either its positive or negative limit. Users may also choose whether or not each axis returns to its original position after the X and Y axes have completed their homing. If you do choose to return axes to their original positions and the “One at a time” option was chosen for how to “Retract and return axes”, then the axes will return to their original positions in the reverse order that they were specified.


–  Users may now also specify specific data that is sent to ProLink’s QC-Calc along with measurements and results. This data is configured through the usual “Output” setting on Program Toolbox steps, but users now have the option to configure QC-Calc text or numeric data. The data is in the format of 15 ‘Text Factors’ and 15 ‘Numeric Factors’. Users may configure these Factors to be populated by VisionGauge® OnLine Numerical and String variables or user-selected text or numbers. Users must include a label for those Factors that they want to send to QC-Calc. This allows easy storage of serial numbers, part numbers, user ids, or other relevant strings that might need to be stored with the measurement data in QC-Calc.
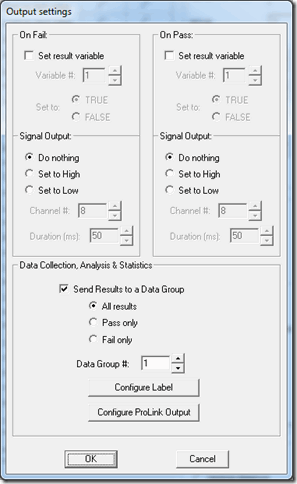
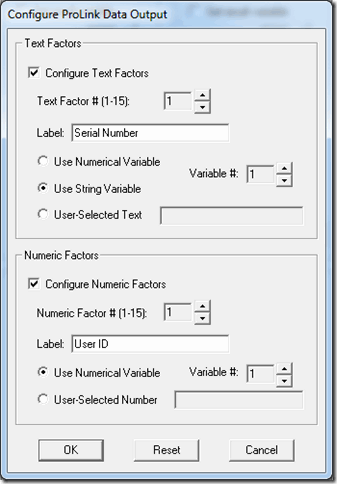
Output settings for data in VisionGauge OnLine's Program Toolbox
ProLink's QC-Calc data output in VisionGauge Online

 –  In the Program Toolbox – Set Illumination step, we’ve added a button to set the illumination for this step to the current illumination settings. We’ve also delinked these illumination settings in the Program Toolbox from the main Illumination settings of VisionGauge® OnLine:  Making changes to the Program Toolbox Illumination settings will no longer change your current illumination settings for the software. Users can still adjust the illumination from the main Illumination dialog on the live image. This will make setting up illumination in a program more efficient.
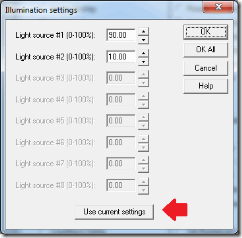
Computer Controlled Illumination settings in the Program Toolbox

– Also, for users of Windows 10 and VisionGauge® OnLine, we’ve corrected an issue where the size of the menu fonts may cause the Overlay Toolbox and Measurement Toolbox to display improperly.
VisionGauge® OnLine version 12.63 is available for download.

VisionGauge® OnLine version 12.63, dated September 22nd, 2017, is available for download.


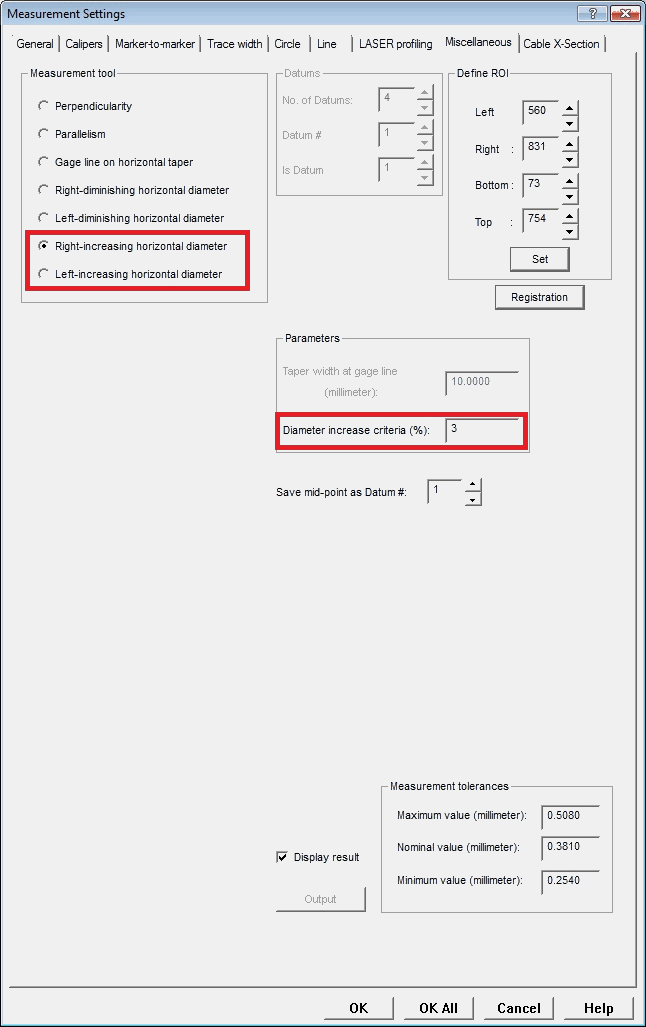
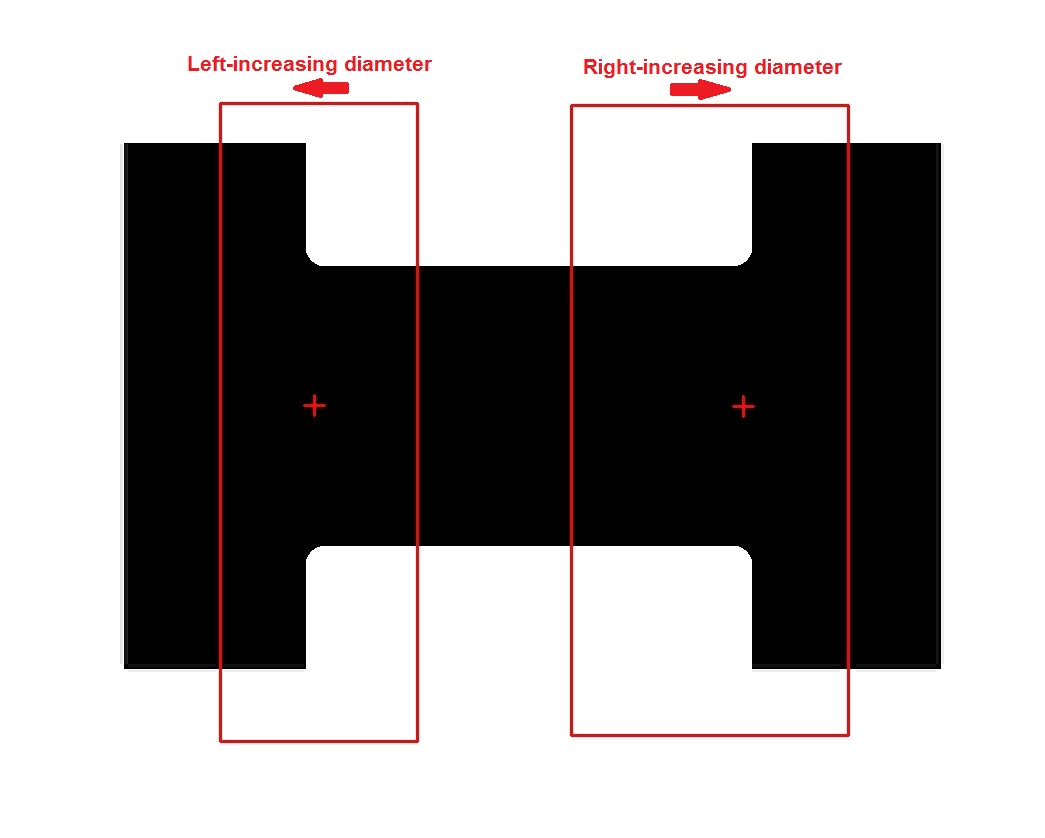
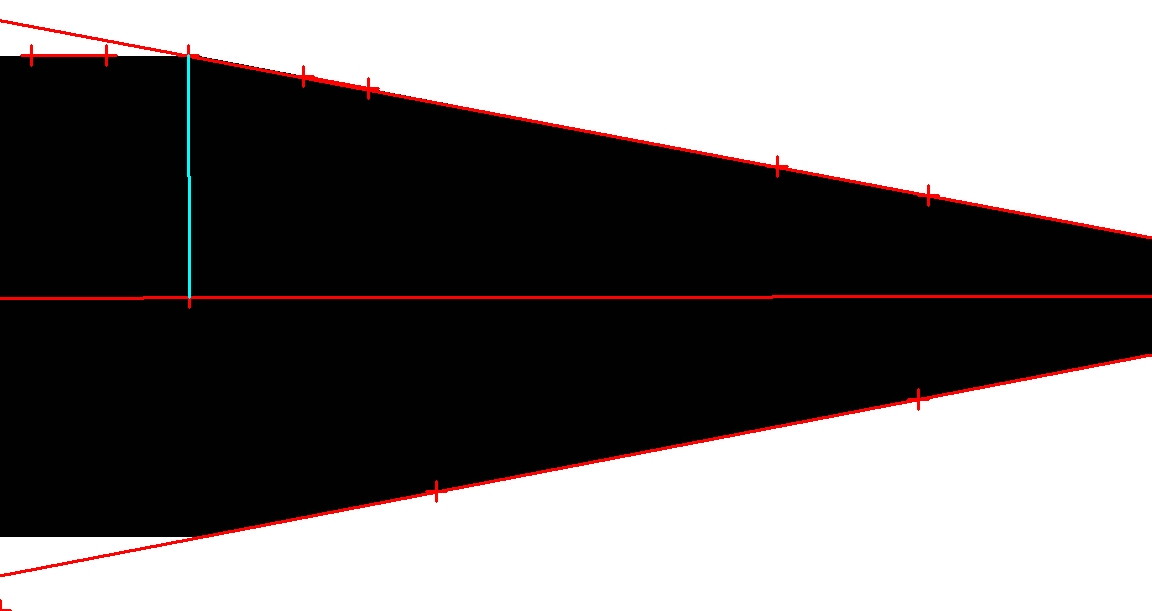
This update adds support for Right- and Left-Increasing Diameter measurements. These new measurement tools may be found in the Program Toolbox – Measurement – Miscellaneous tab. These tools are particularly useful for finding the point on a part where a part’s diameter begins to increase. Users may specify the “Diameter increase criteria” as a (positive) percentage by which the diameter is allowed to increase before the sub-pixel accurate measurement location is returned.

Increasing Horizontal Diameters measurement tool in VisionGauge OnLine
Increasing Horizontal Diameters measurement

VisionGauge® OnLine version 12.52 is available for download.


VisionGauge® OnLine version 12.52, dated August 10th, 2017, is available for download.

This update includes the following enhancements:


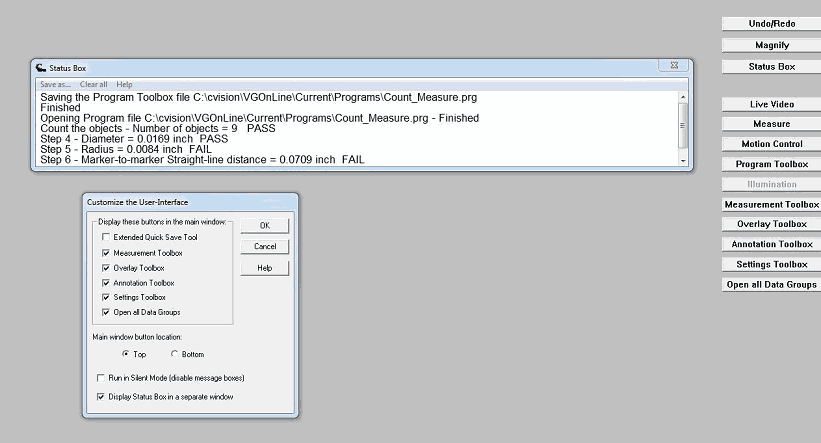
– The VisionGauge® OnLine Status Box can now be displayed as a floating pop-out window, instead of docked at the bottom of the screen. This allows more vertical space for image display with less cropping on certain systems. The pop-out status box window still receives all program output and measurement results, and it is scrollable up to 5000 lines. Users have the option to save the contents of the Status Box window to a text file or clear the status box to focus only on new results.

To enable the pop-out status box option, access the “Customize – User Interface” menu and select “Display Status Box in a separate window”. Having the status box pop-out window active will also enable a new “Status Box” button on the right side of the screen which opens and closes the window. Data will still be collected in the status box even if it is closed.

Separated Status Box window in VisionGauge OnLine


– We’ve added the ability to “Cutout an image portion” in the Program Toolbox’s Image Manipulation tool. Simply specify the Region Of Interest, and also indicate if you want to be working on the raw image or the image with any and all annotations that you might have at runtime. This tool can be useful to automatically save a smaller portion of an image during a program, which reduces the image size. This can make it easier, for example, to email or to bring focus to a specific area of interest in the image.

Program Toolbox - Image Manipulation - Cutout Image Portion operation

VisionGauge® OnLine version 12.38 is available for download

VisionGauge® OnLine version 12.38, dated July 11th 2017, is available for download.

This update includes the following enhancements:


– VisionGauge® Online can now send Pass/Fail results in Character String and Pass/Fail Data Group types to ProLink. Previously only Numerical Data Groups were supported in sending results to ProLink. Please note that no tolerance information sent (this can be set directly in ProLink, if needed), and the results will appear as Pass with a value of 1 and Fail with a value of 0.


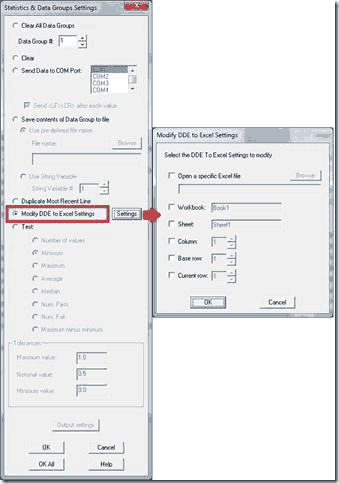
– In the “Program Toolbox – Statistics” step settings, users now have the option to modify the DDE-to-Excel settings for a specific data group. This allows for more advanced reporting capabilities to Excel during the operation of a program.

Program Toolbox - Statistics - Modify DDE to Excel settings


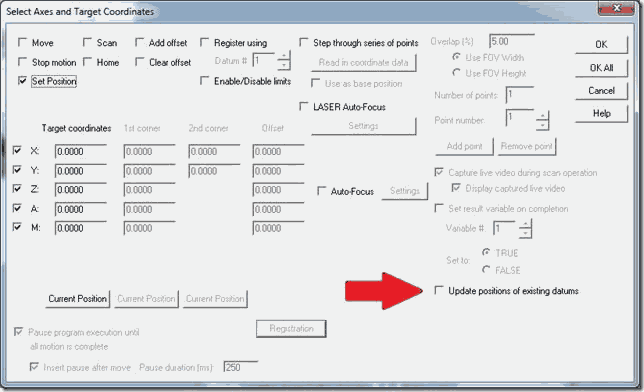
– In the “Program Toolbox – Motion Control” step, when “Set Position” is selected as the operation, users may now choose if setting the new stage position will affect the positions of existing datums. This option has no effect on datums that are created or overwritten after the “Set” operation.

Program Toolbox - Motion - Set Position Update Existing Datums option

VisionGauge® OnLine version 12.32 is available for download

VisionGauge® OnLine version 12.32, dated June 27th 2017, is available for download.

This update includes the following enhancements:


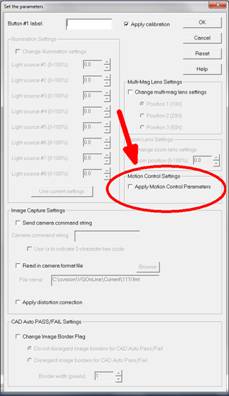
– When the Settings Toolbox “Apply Motion Control Parameters” button is checked when setting the parameters, the current motion control convergence criteria (for all of the axes) is also saved (along with the velocities, etc…). Then, when that button is pressed, the current motion control convergence criteria is set to the ones that were saved…

Settings Toolbox - Apply Motion Control Parameters


– The maximum number of datums has been increased to 500.


– String variables have been increased in length. Each string variable can now hold up to 256 characters


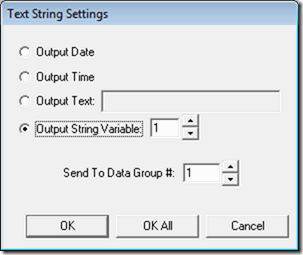
– The Program Toolbox – “Text String” step operation can now output the date and time to a Character String Data Group during a program.


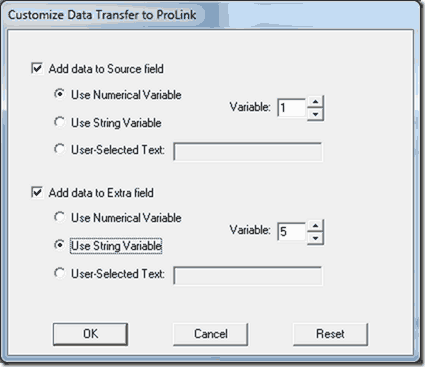
– VisionGauge Online now outputs the tolerances specified for a measurement to ProLink. Also, a “Source” and “Extra” field are able to be output for each measurement. The Source field is usually used as a ‘machine source’ fixed id, and the Extra field can be used for additional data about the measurement. Numerical variables, string variables, or a user-specified fixed string can be selected as the content for these fields in the main menu “Customize – Data Transfer – Prolink” menu item.

Customize Data Transfer to ProLink

– We’ve carried out some enhancements to the “Presence Verification” mode of the software’s CAD Auto Pass/Fail tool to improve performance.