Medical implants transform lives, sometimes making the difference between pain and mobility, or even life and death. With such critical roles, flawless manufacturing is not just preferred — it is demanded. But as implant designs become increasingly intricate, manufacturers face mounting pressure to deliver both uncompromising quality and higher throughput. Traditional inspection methods fall short in this new landscape, unable to keep pace with complexity and demand.
To close this gap, the industry is turning to innovative technology, such as digital optical comparators. This article explores how digital optical comparators are shaping the next era of implant inspection, providing a path toward accurate, streamlined, and reliable quality control.
The High Stakes of Implant Quality Control
Precision is critical in implant manufacturing. Every component must perform reliably and in harmony with the human body for years or decades. The cost of a single defect can be catastrophic. Beyond the human toll, which can mean surgical revision and serious injury, there are immense financial and reputational stakes for manufacturers.
Organizations such as the Food and Drug Administration (FDA) and global standards like ISO 13485 enforce rigid controls over the design, production, and post-market surveillance of implants. Industry standards require manufacturers to ensure error-free reporting and complete traceability. Teams must document each measurement, inspection event, and test result to create a device history record that withstands rigorous audits.
Failing to comply with these standards can result in legal consequences, such as hefty fines and costly product recalls. Additionally, quality lapses can trigger production delays, result in regulatory sanctions, and reduce public trust. These implications mean that for manufacturers, robust inspection quality control is critical for risk management and a differentiator in a fiercely competitive market.
Today’s Biggest Medical Implant Inspection Challenges
Inspection in the medical implant industry must keep pace with advancing technologies and evolving product designs. As expectations rise for both quality and manufacturing speed, inspection methods are under pressure to adapt. Understanding the hurdles in modern quality control is vital to meeting regulatory, safety, and production demands.
Despite advances in manufacturing, the inspection process for medical implants faces three primary hurdles:
Complex Geometries
The adoption of additive manufacturing and high-speed computer numerical control (CNC) machining enables the production of implants with intricate lattices, undercuts, and organic contours. While these designs deliver superior performance and patient outcomes, they introduce features that are nearly impossible to measure with hand tools or traditional profile projectors. Even basic dimensional checks often require novel approaches or customized tooling, which slows processes and raises costs.
Advanced Materials
Implant engineers are leveraging the latest in biomedical polymers and metal alloys to reduce rejection, improve integration, and extend service lifespan. However, these materials often present unique challenges.
Reflective surfaces, such as titanium or cobalt-chrome alloys, can cause glare and distortions under typical inspection lighting. Additionally, translucent or low-contrast polymers are hard to visualize using standard optical systems. The result is that conventional measuring devices produce unreliable or unrepeatable results.
Traditional Method Limitations
Legacy tools, such as manual calipers, micrometers, or analog profile projectors, were not designed for the modern implant landscape. These tools often result in slow measurements that can’t keep up with high-volume runs. Results can also vary depending on user skill and judgment, introducing operator error and inconsistency. Finally, a lack of automatic record-keeping or part tracking makes traceability laborious or incomplete.
What Are Digital Optical Comparators for Implant Inspection?
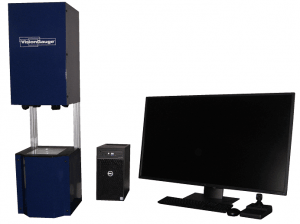
Digital optical comparators directly address the evolving demands of implant inspection. These automated vision systems combine high-resolution cameras, precision optics, and powerful software to overcome traditional challenges.
To inspect medical implants, inspectors place a physical part into the comparator, which captures the part’s profile and critical features. The system creates a digital image and superimposes that image on the part’s original computer-aided design (CAD) drawing to perform a direct comparison. The system will highlight any deviation between the manufactured component and the approved design, allowing the inspector to determine pass or fail conditions objectively.
Unlike manual inspection, the digital optical comparator automatically determines compliance and enhances accuracy. This process removes guesswork, operator bias, and subjective judgment. The result is a faster, data-driven overlay that supports robust, auditable implant inspection.
Key Capabilities for Inspecting Medical Implants
As implant designs and materials grow more advanced, inspection systems must evolve to keep pace. Selecting the right technology means considering not just speed, but a system’s ability to capture, analyze, and document every detail with precision, delivering reliable results that support both quality and compliance mandates.
Modern digital optical comparators offer several technical advancements that make them essential for implant manufacturers striving to inspect medical implants effectively:
- Automated CAD-to-part comparison: Automating the overlay process, digital optical comparators rapidly and accurately align the captured image with the design file. This ensures teams can check every feature, from complex curves to tiny undercuts, in seconds. The result is near-instant identification of deviations without the need for time-consuming template setup or manual interpretation.
- High-resolution imaging: Digital optical comparators leverage advanced optics and adaptive lighting to capture sharp, distortion-free images of even the most challenging materials. Adjustable ring lights and polarizing filters eliminate glare and hot spots on reflective metals, like titanium or stainless steel. Programmable illumination and high pixel density enable reliable feature recognition, even in semi-transparent materials, such as low-contrast plastics.
- Non-contact measurement: Many implants are delicate, sterile, or have sensitive surfaces. Non-contact inspection ensures no risk of contamination, scratches, or damage, preserving part integrity throughout the process.
- Data and reporting: These systems automatically record all measurements, including dimensional data, deviation maps, and photographic evidence. Systems can generate detailed reports and maintain a comprehensive device history record for every inspected part, ensuring full traceability and compliance with FDA and ISO 13485 requirements. This digital archive streamlines audits and simplifies lot release, reducing manual paperwork and ensuring nothing gets lost.
Emerging Trends in Implant Manufacturing to Note
Staying competitive in medical implant manufacturing requires forward-looking strategies that anticipate industry shifts. Continuous innovation in quality control and production workflows is essential. Observing how advanced technologies and data-driven approaches are shaping the landscape can help organizations proactively adapt, ensuring quality, efficiency, and regulatory alignment as the market evolves.
Looking forward, there are several key trends influencing the future of orthopedic implant inspection:
- Rise of automated inspection: Manufacturing plants are moving toward higher degrees of automation to meet demand while minimizing labor costs and human error. The next-generation digital optical comparators are designed for integration with robotic handling and automated work cells, enabling unsupervised inspections that run around the clock.
- Personalized, patient-specific implants: As custom implants and one-off runs become commonplace, manufacturers face constant reprogramming and setup changes. Digital optical comparators shine here, allowing rapid changeover with minimal operator intervention. Easy-to-use, menu-driven programming enables teams to complete inspections for personalized orthopedic implants with the same rigor as high-volume parts.
- Using inspection data for process optimization: Inspection data is increasingly beneficial for giving feedback to manufacturing operations. Analysis of deviation patterns can drive process refinements, identify equipment drift, or inform preventive maintenance decisions. Over time, this closed-loop approach improves yields, lowers scrap rates, and accelerates continuous improvement.
Secure Your Place in the Future of Manufacturing
The challenges of medical implant inspection are significant, but modern technology, like the digital optical comparator, provides a clear and reliable solution. VISIONx, Inc. provides a leading example of this technology. Our VisionGauge® Digital Optical Comparator models offer the fastest, easiest, and most accurate way to inspect and compare parts.
These systems can enhance processes and improve patient outcomes with all types of medical implants. Connect with us to discuss your specific application and discover how to integrate this advanced technology into your workflow.


